Unlocking the Vaults in ARC Raiders: All Keyroom Locations (Dam Battlegrounds)
Clearly, to navigate successfully through the scavenging environment, one must be quite aware of high-value caches that are scattered through the maps. Players wanting to loot in optimum conditions really need to know All Keyroom Locations in ARC Raiders on that Dam Battlegrounds map. Each locked room is fully detailed with the exact location it will be and what kind of loot can be drawn from it, then assessed to rank the overall loot in terms of its selling point- especially during a high-powered Night Run-to enable you to determine which keys are worth prioritizing.
In this ARC Raiders Guide, we analyze and rate five distinct Keyroom locations on the Dam map (out of five) based on guaranteed loot spawns, high-tier potential, and Player-versus-Player (PvP) engagement risk.
Water Treatment Control: Observation Keyroom
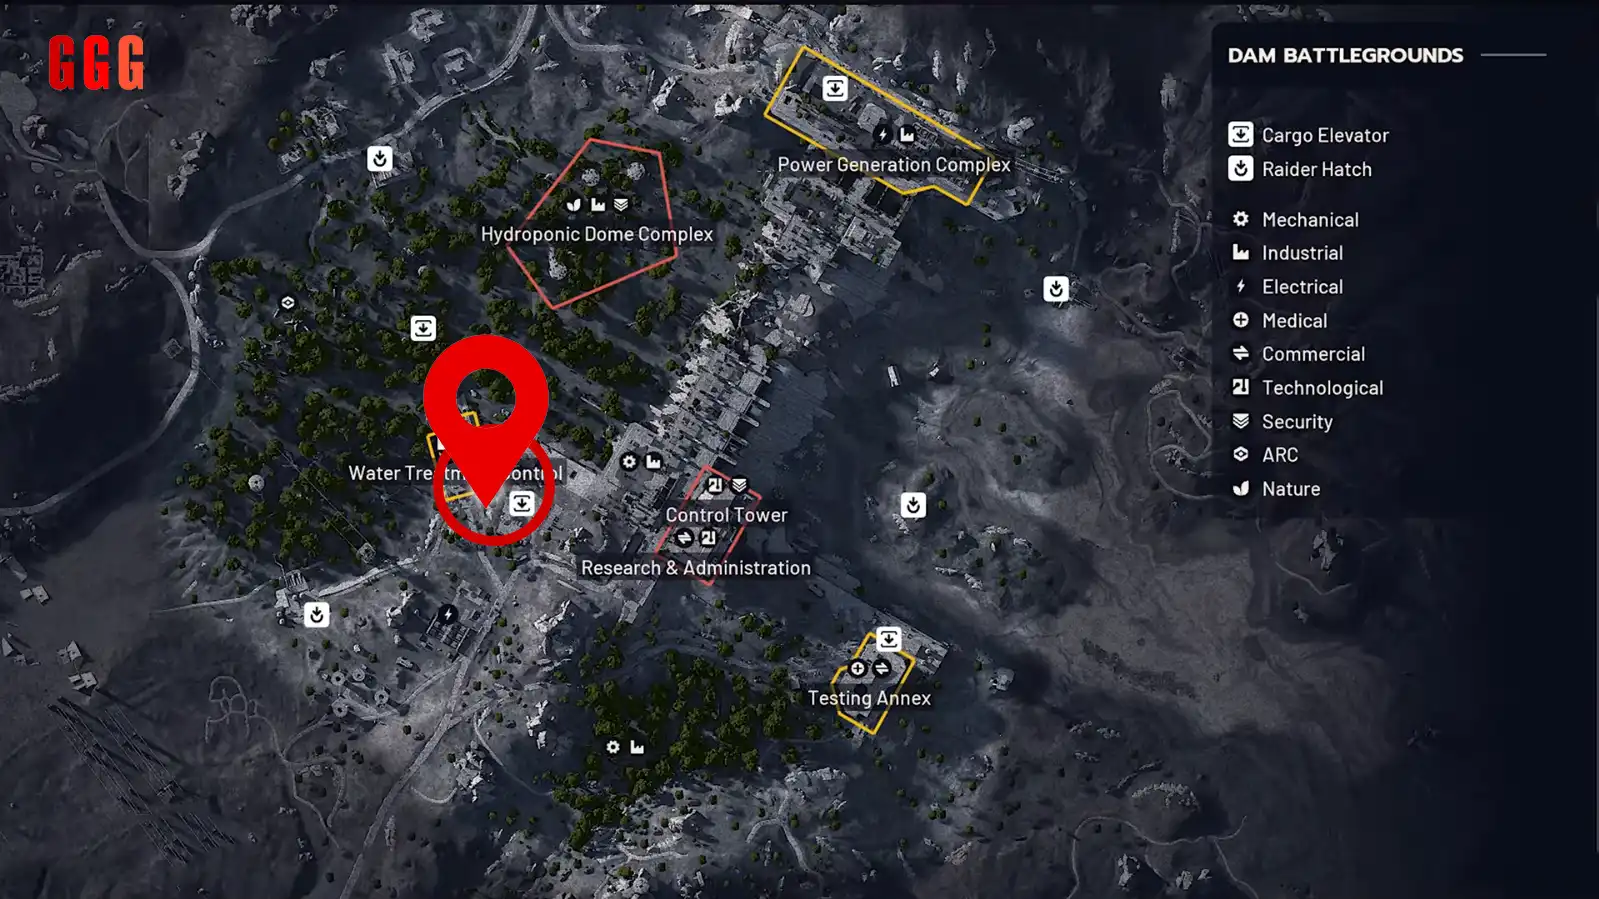
This keyroom is always contested because of its closeness to a high traffic area of loot and relative ease of access.
Location: Inside Water Treatment Control structure, accessible via one of the side entrances.
Contained Loot: Weapon Crate, Ammo Crate, Grenade Crate (Potential), Several Red Lockers, and some random loose loot spawns.
Expert Analysis & Ranking: A great room providing good base, more chances for blueprints, and fine attachments from the Red Lockers. The down part is that it's in a heavily crowded PvP area; therefore, extraction tends to be a little dangerous.
Power Generation Complex: Power Rod Keyroom
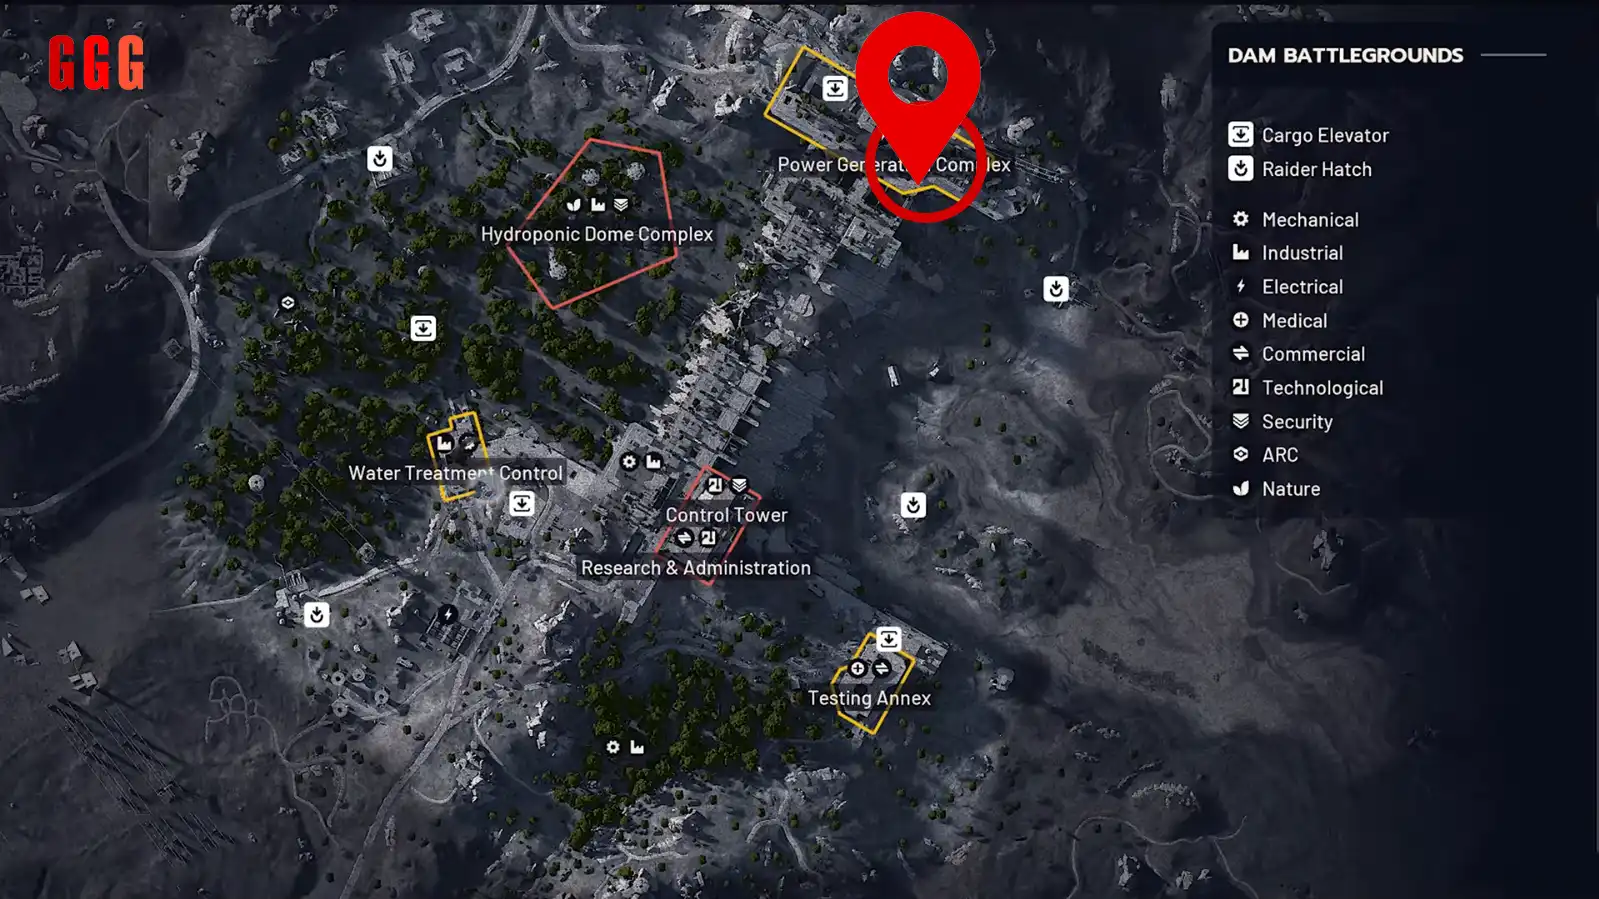
This keyroom is compulsory when it is about a player serious about blueprints and high-rarity weapons. The key to this room is the Power Rod.
Location: Far down in the underground area of Power Generation Complex.
Contained Loot: The area is packed with several spawns of the Wolf Pack, guaranteed high-tier loose loot, and high chances of Purple-level weapons and rare blueprints. Multiple server stacks inside can also be crashed.
Strategic Tip: The value of this room gets inflated way more in a Night Event. Day runs usually yield blue items, while Night Run can spawn multiples of Wolf Packs and its super coveted purple-tier weapons.
Ranking: 5/5 (Highest pure loot density and most apparently at night).
Control Tower Analysis: The Dam Staff Keyroom
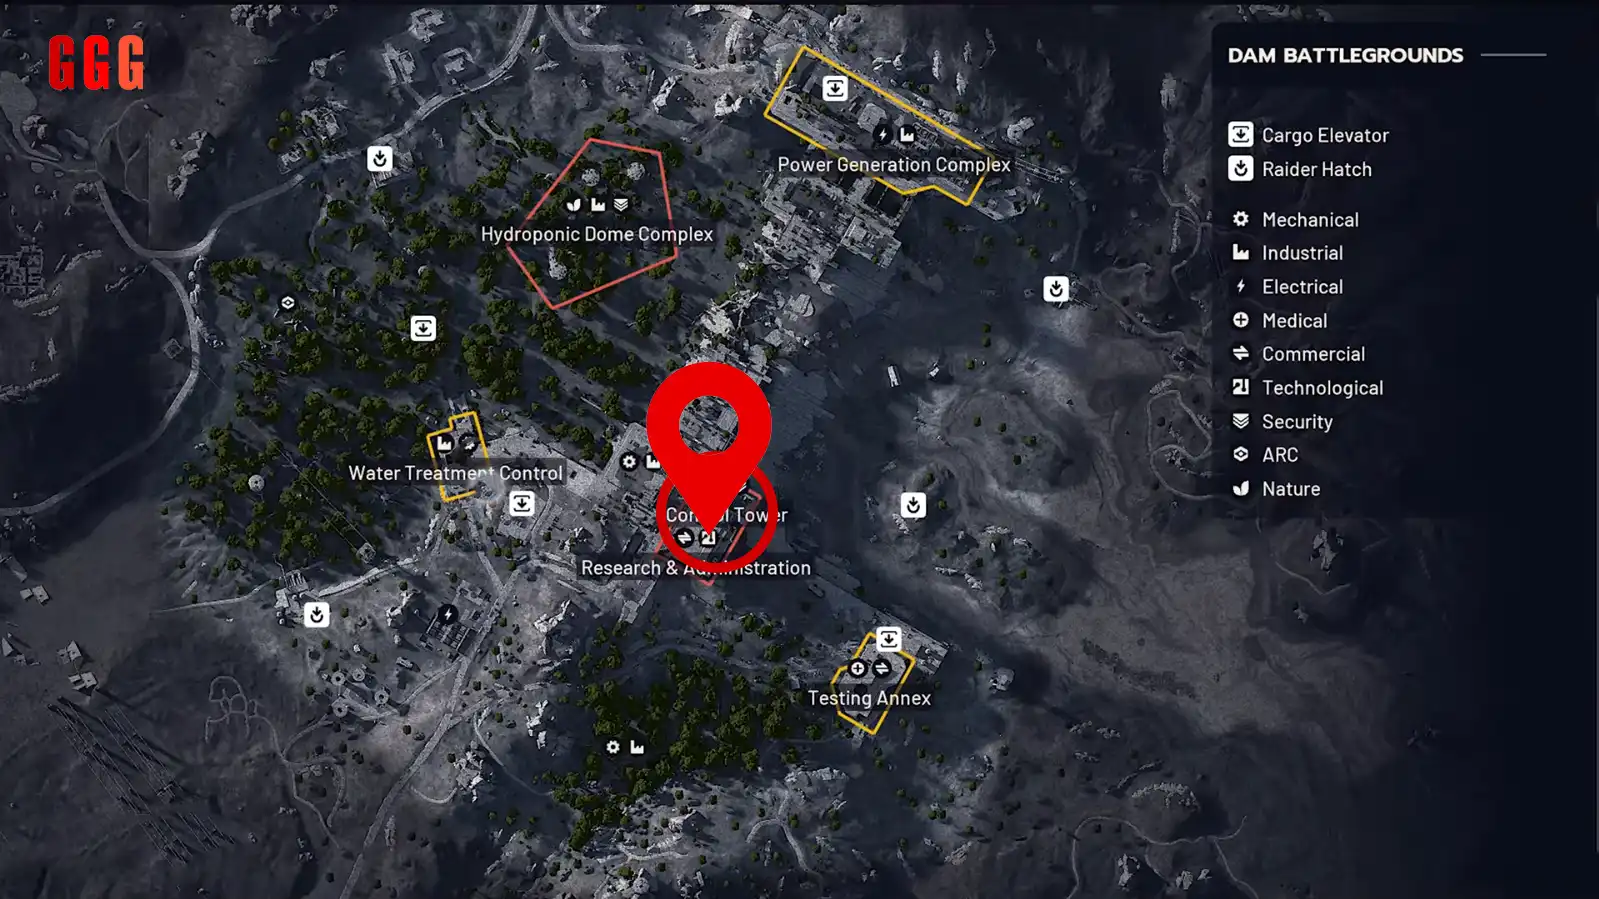
It is found on the base of the main Control Tower structure. It sometimes escapes attention but serves fine purpose with its large number of lockers and security breach chances.
Location: Ground floor of Control Tower, near main entrance and around corner from down central zip line.
Contained Loot: Security Breach container, a large number of Red Lockers (known for spawning attachments, blueprints, and consumables like Trigger and Tracking Grenades).
User Experience: This is one surprisingly underrated keyroom. The sheer number of Red Lockers combined with Security Breach forms a consistently high-value return. It is worthwhile to save your Staff Room keys for a Night Run.
Ranking: 4/5 (Excellent combination of guaranteed Red Lockers and breach potential).
Control Tower Peak: The Dam Control Tower Keyroom
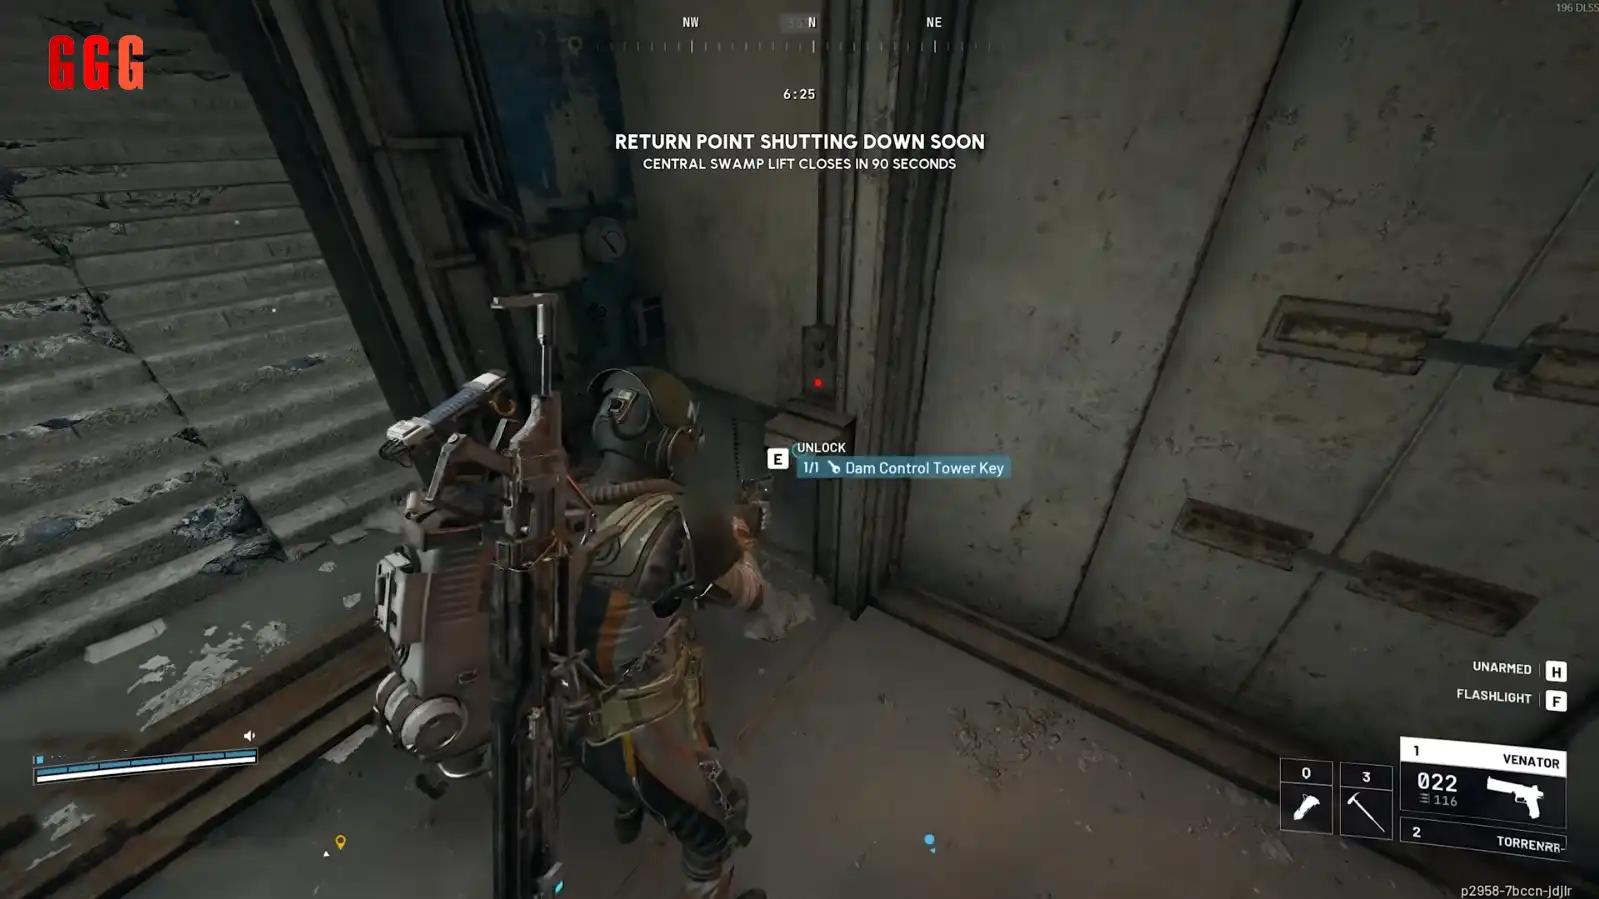
This high-altitude keyroom requires a steeper climb via zip lines as well as a lot of the time resistance from ARC enemies and other possible players.
Location: At the very top level of the Control Tower, comes via zip lines (be careful to avoid the stationary turrets as well as Ticks as you ascend).
Contained Loot:
A number of Red Lockers.
Guaranteed Weapon Crate spawn.
Security Breach locker and breach containers nearby.
Loose loot and possible grenade/gun cases around the perimeter.
Risk Assessment: The quality of loot here merits quite easily a 5/5, but the Control Tower being so highly PvP risky makes it relatively inaccessible. You will probably have to resort to door blockers or traps for securing the area.
Ranking: 4/5 (High-quality loot, but significant PvP risk and challenging traversal).
Testing Annex: Two Keyroom Locations
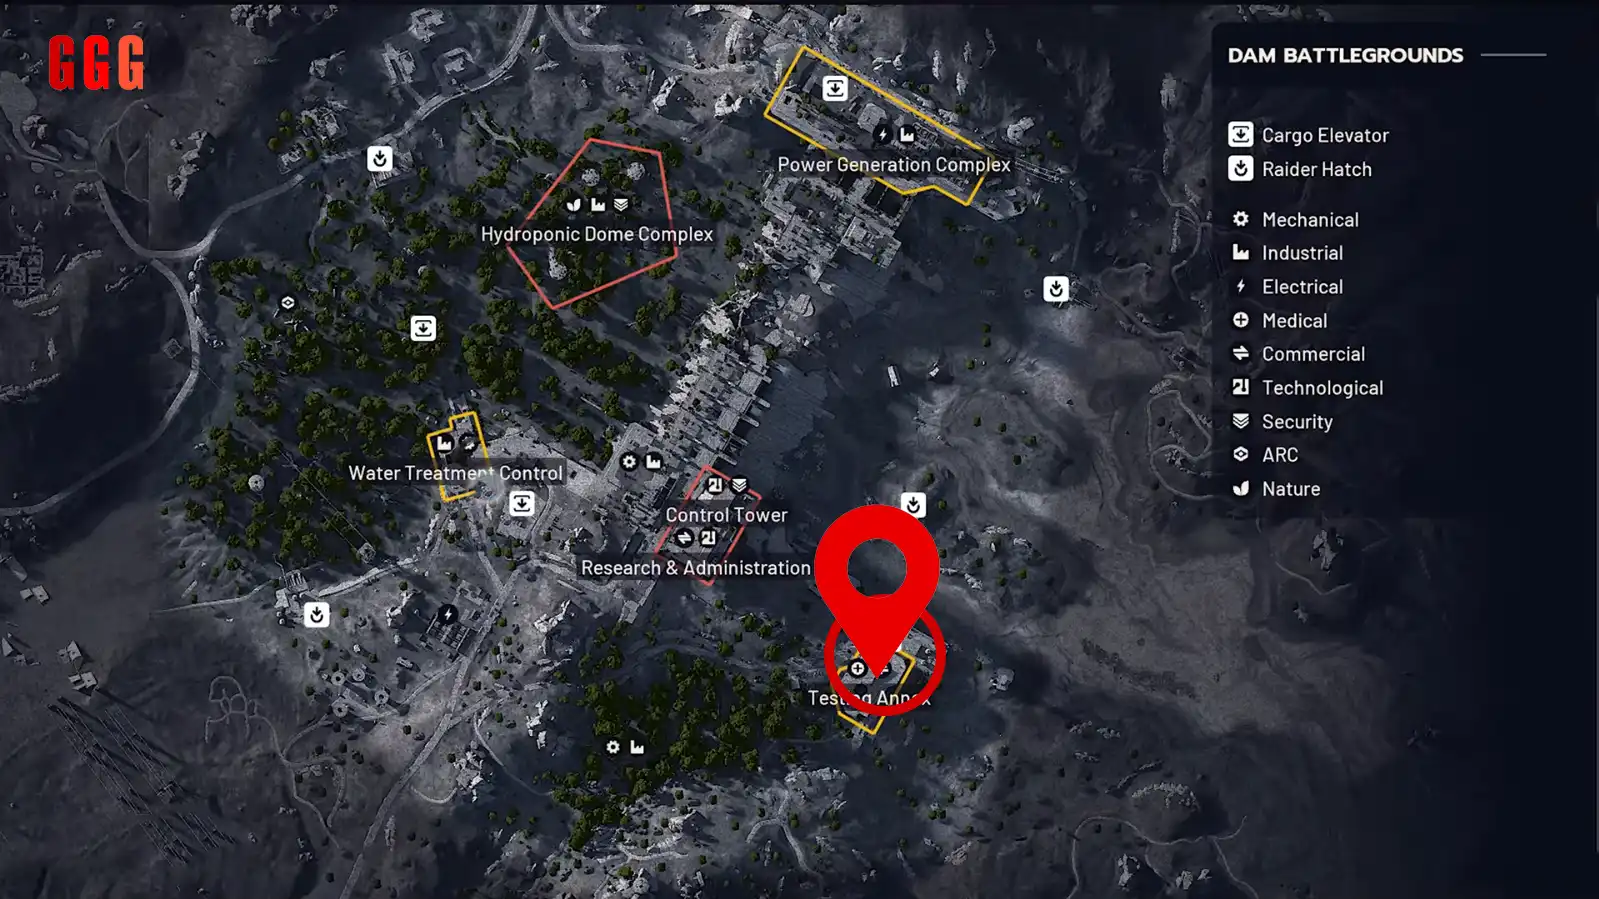
Within Testing Annex, it holds two different doors that consume the same key. Players should, however, concentrate on the second location for optimum return.
Key Requirement: Testing Annex Key.
Location 1 (Desk/Server Room): Down the main stairs. Contains Red Lockers, loose loot, and multiple breach servers. Ranking: 2/5 (Decent, but top-tier blueprints or weapons few and far between at best).
Location 2 (Secondary Lab/Loot Focus): Down the corridor and just around the bend from Location 1. This room is much larger.
Contained Loot: Multiple desks/drawers with high loose loot spawn potential (where we got multiple blueprints so often in a single run) and grenade tubes. This room has more searchable loot density but fewer starting Red Lockers or breach servers.
Ranking: 4/5 (Statistically, this location should offer much better odds for Blueprint and high-value item drops).
Consistently use the Testing Annex Key on the secondary location to really maximize the chance of getting a rare blueprint and attachment.