How can the Ready or Not Tactical Guide turn you into a SWAT legend on Greased Palms? Yo, tactical shooters, Ready or Not’s postal warehouse map is a beast, but our Ready or Not Tactical Guide has the ultimate strats to nail that S-rank in 2025! With open spaces, aim-bot AI, and six tough objectives, Greased Palms demands precision. From loadout picks to clearing routes, these tips—built from the full game—will make you unstoppable. Let’s lock and load, squad!
Why Greased Palms Is a Nightmare
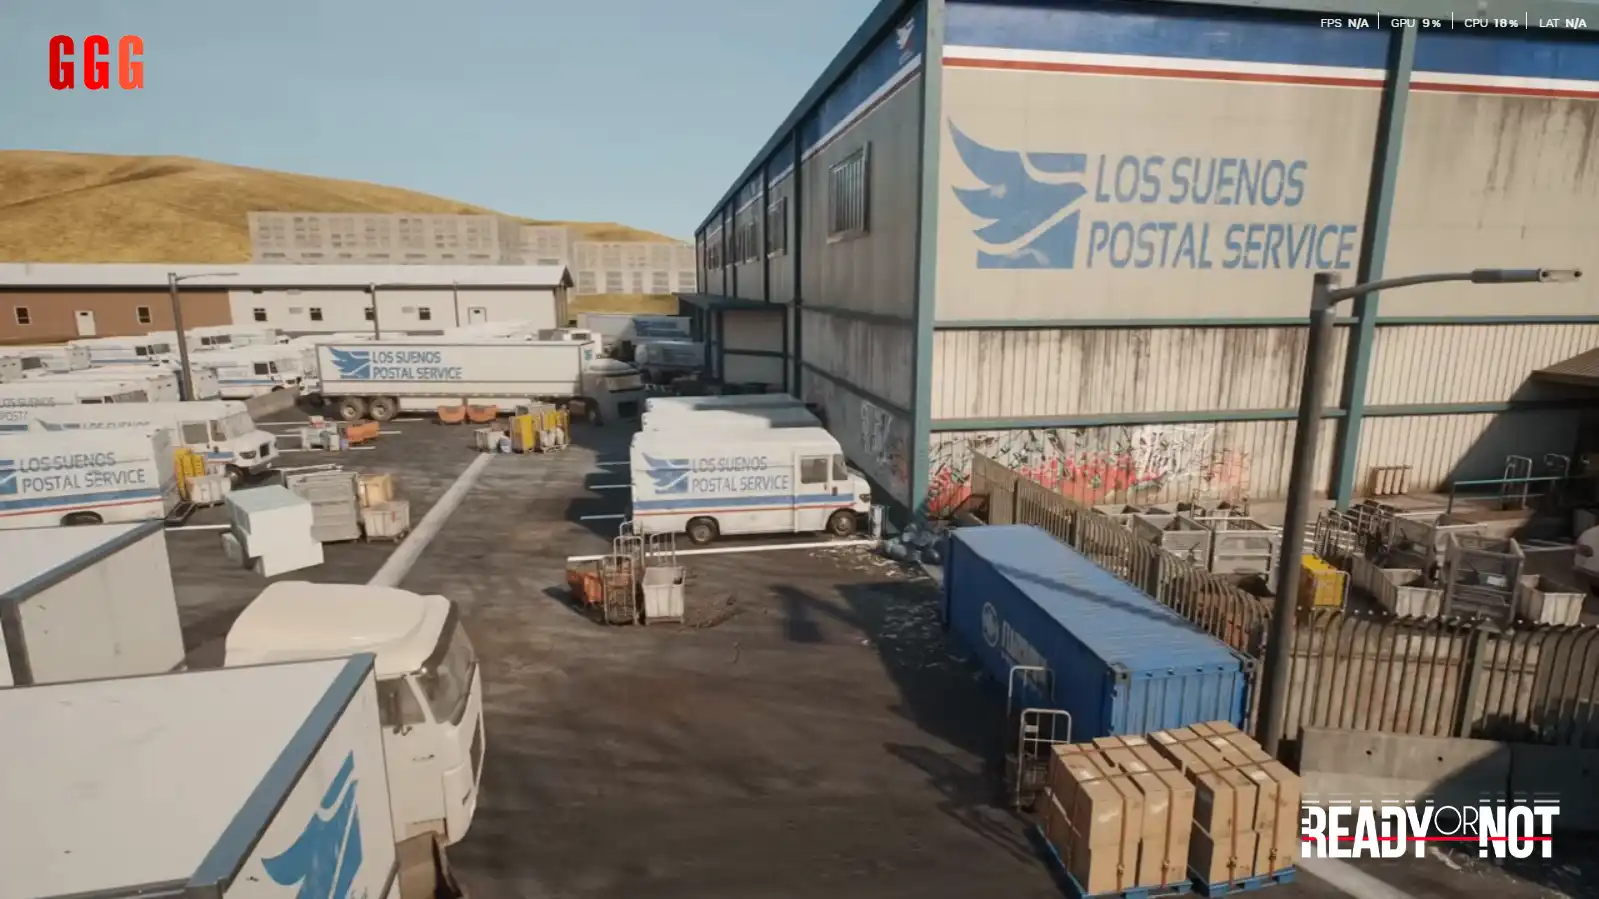
The Ready or Not Tactical Guide starts with why Greased Palms is brutal. Set in a sprawling postal warehouse, it’s packed with long sightlines and AI that can snipe through tiny cracks. You’ll face 16-18 suspects and six objectives: bring order to chaos, rescue civilians, arrest Agent Adams, arrest Maria Lopez, find Eugene Gomez, and locate the Pfizer office. Two soft objectives—report a shooter and a weapons cache—add extra pressure. This map’s chaos demands a plan!
Best Loadout for S-Rank Success
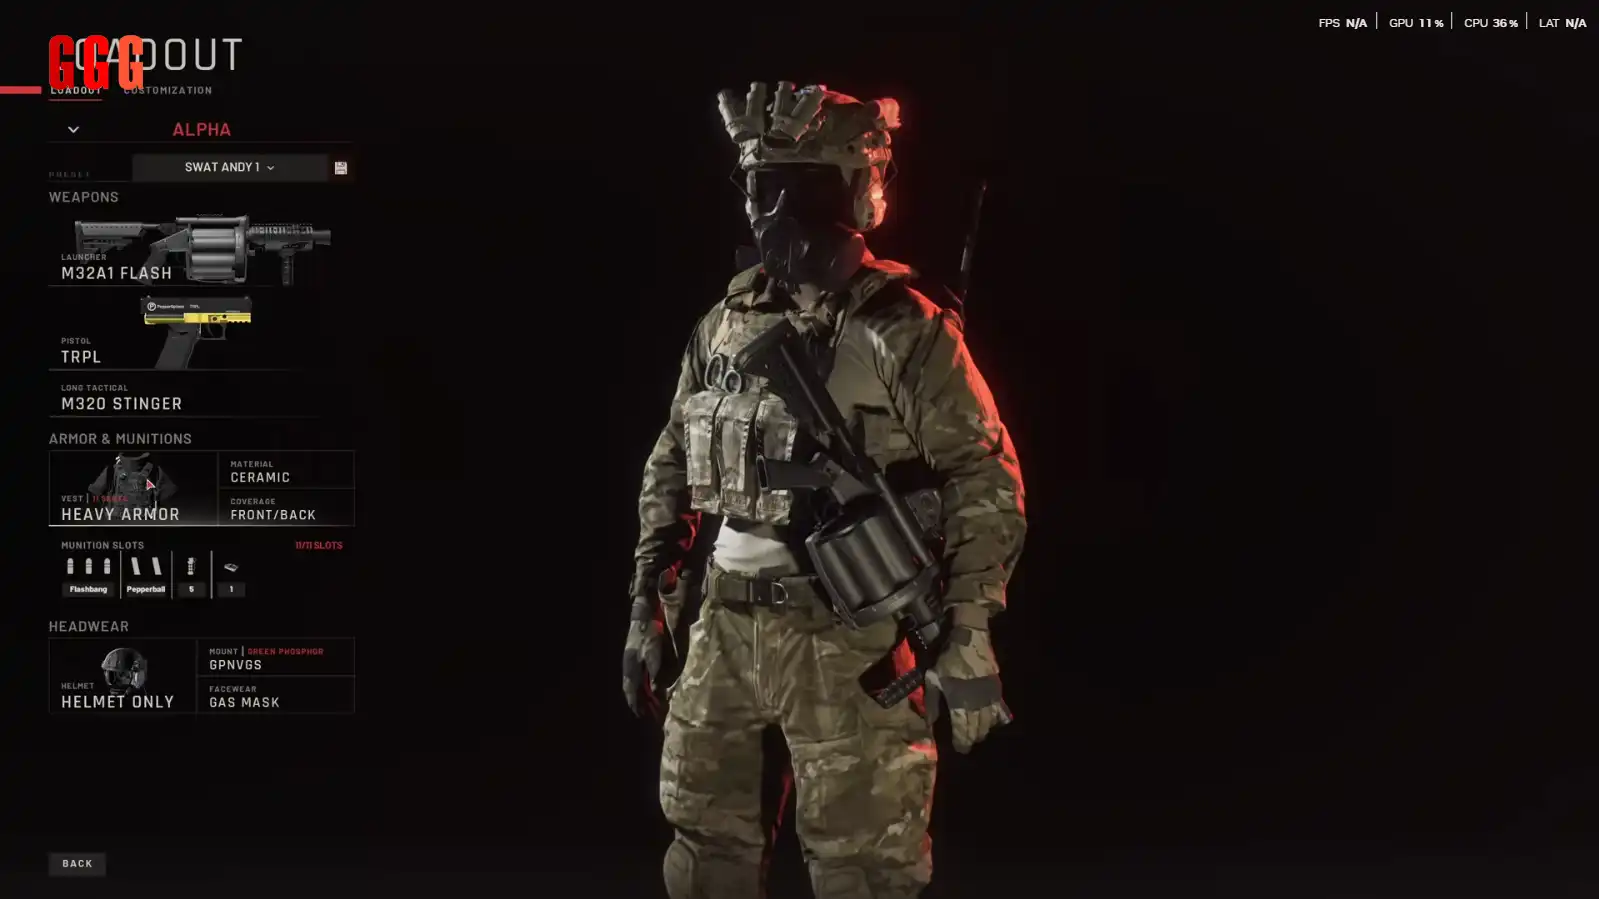
Your Ready or Not Tactical Guide loadout is key to surviving Greased Palms:
- Primary: AM-32A1 Flash Launcher (long-range stuns for non-lethal takedowns).
- Secondary: Five-Seven (high mag capacity, armor penetration for armored suspects).
- Armor: Heavy Armor (Steel type) for max protection.
- Munitions: 5 flash launcher rounds, 3 Five-Seven mags, 3 flashbangs.
- AI Loadout: Equip your SWAT team with wedges and less-lethal weapons to safely detain Agent Adams, who may pull a gun.
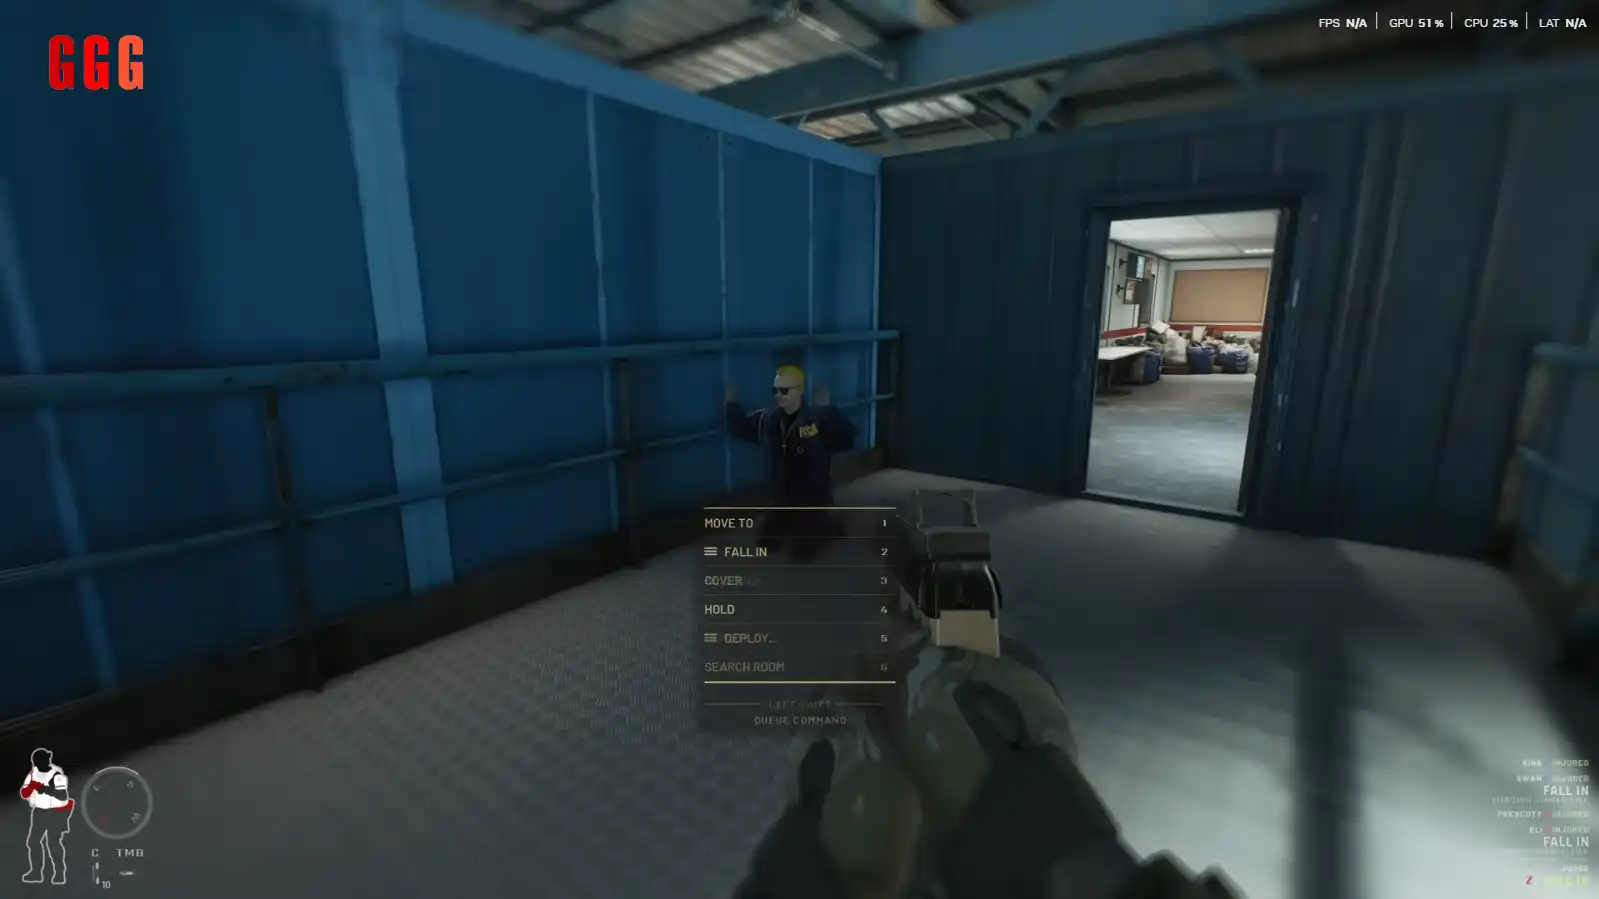
Clearing Strategy: Divide and Conquer
This Ready or Not Tactical Guide breaks down the optimal clearing path:
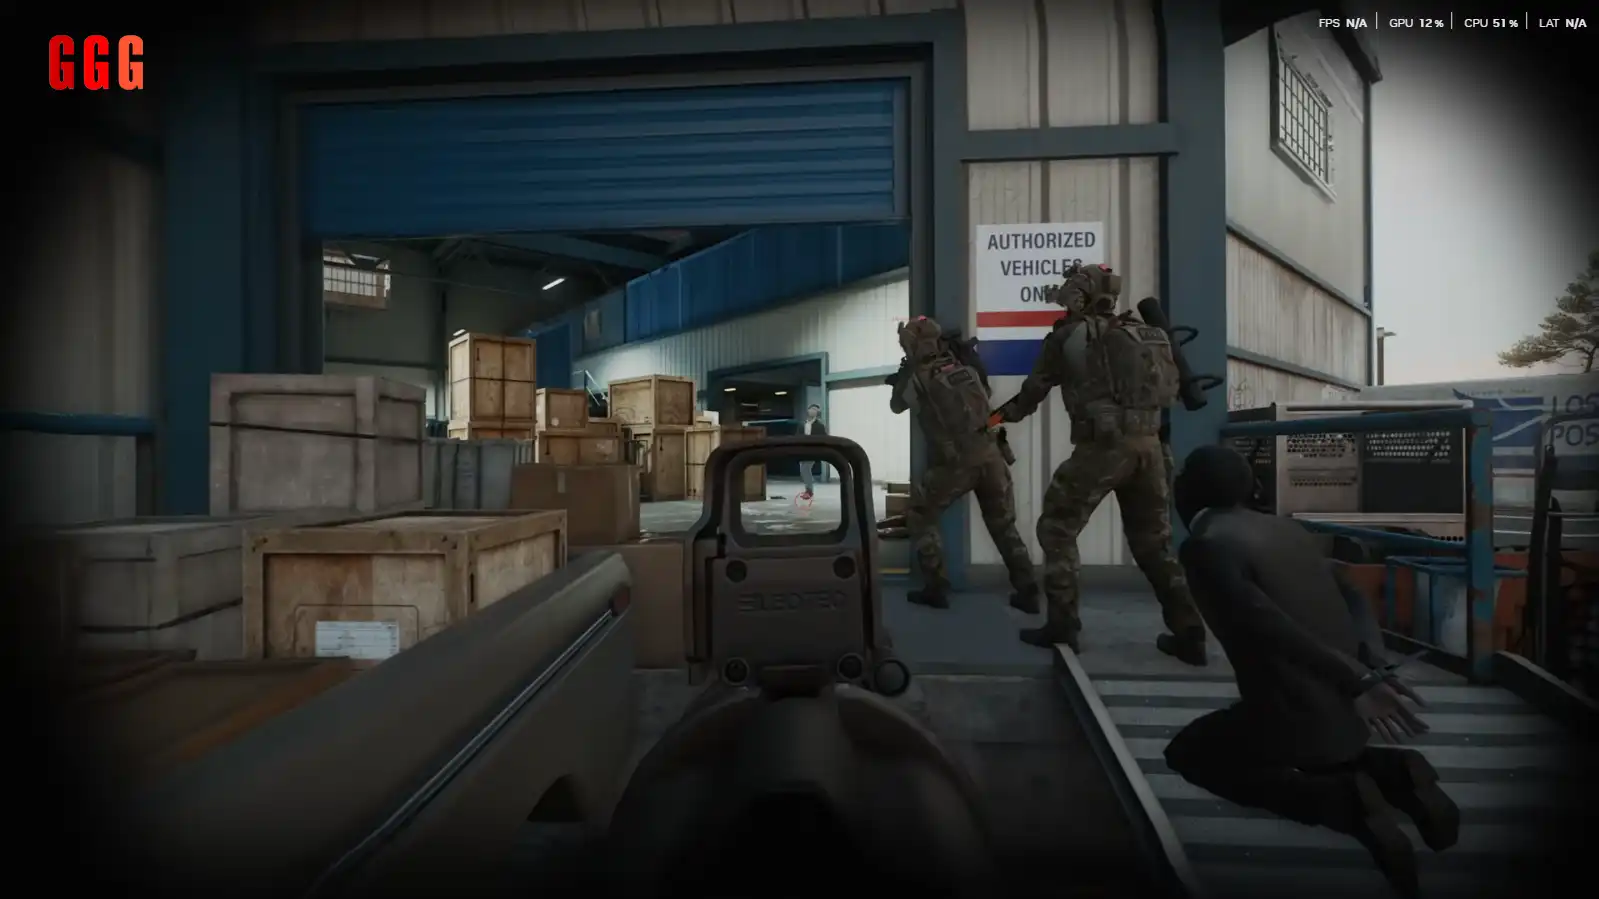
- Wedge Exterior Doors: Secure all four wedgeable doors (two perimeter, two main entrances) to limit suspect movement.
- Clear Exterior: Start with the break room and loading bay, grabbing the weapons cache soft objective (back of a truck).
- Main Lobby Entry: Enter via the front lobby for better control, leaving one team to watch the rear loading bay.
- Mirror Everything: Use the mirror gun to check corners—AI won’t hesitate to blast through gaps.
- Upstairs Push: Clear the main warehouse, then hit the stairs to the Pfizer office (back, below second floor). Watch for Adams, Lopez, and Gomez, who spawn randomly.
Handling Key Objectives
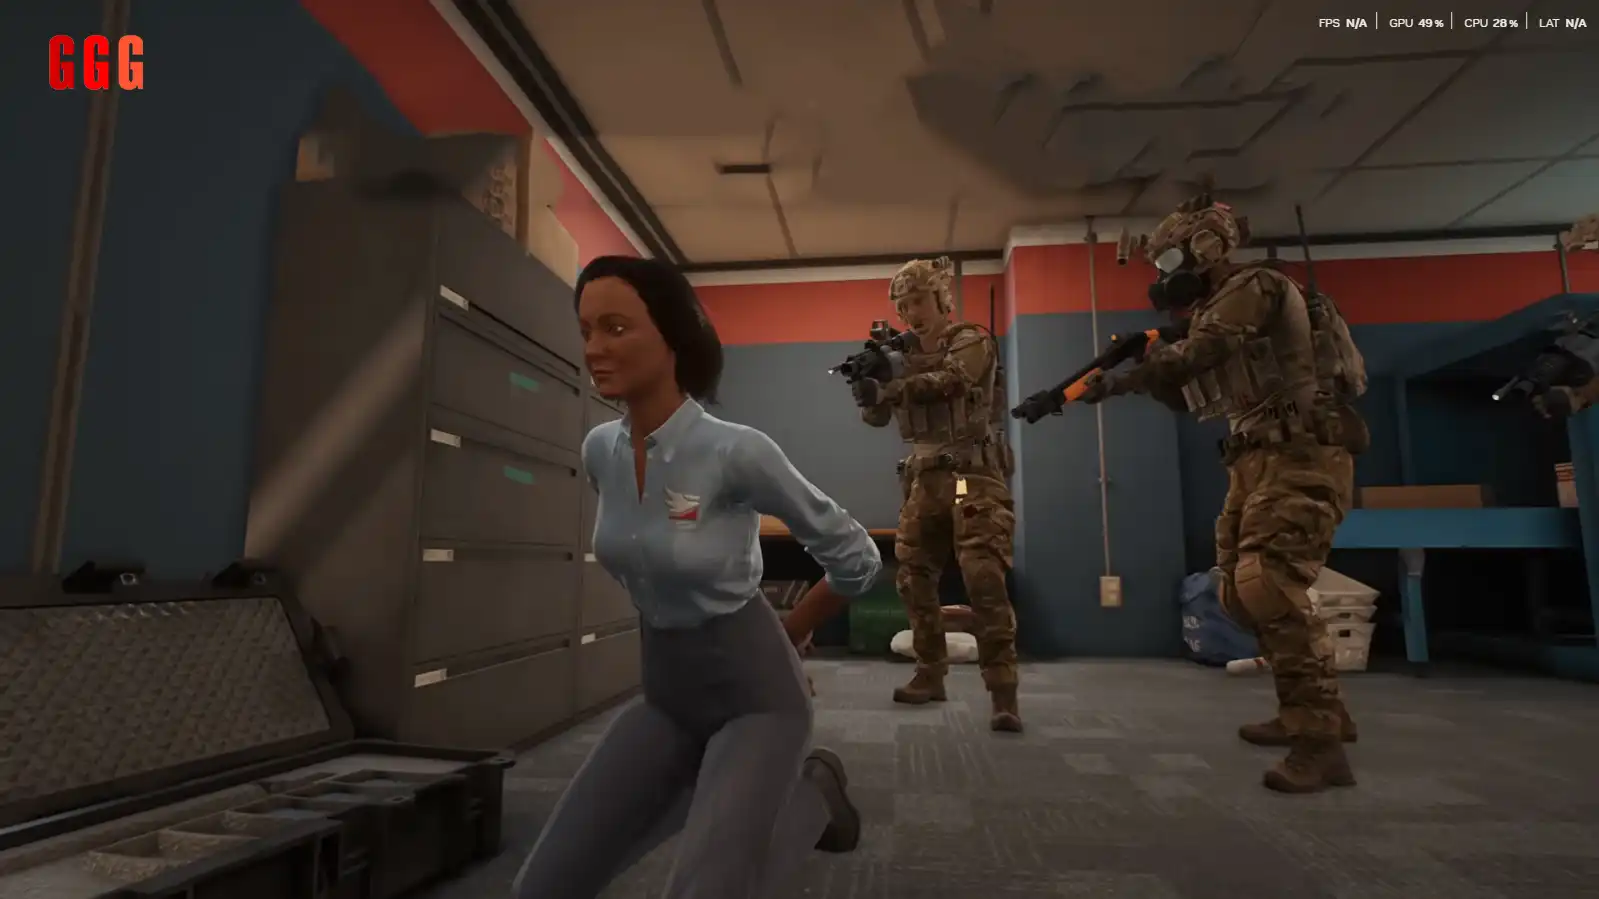
The Ready or Not Tactical Guide emphasizes non-lethal precision:
- Agent Adams: Use flashbangs or the AM-32A1 to detain him without lethal force, as he may engage.
- Maria Lopez & Eugene Gomez: Check common spawn spots (warehouse shelves, offices) and use less-lethal takedowns.
- Pfizer Office: Located near the back, below the second-floor office area—clear systematically to avoid ambushes.
- Soft Objectives: Report the shooter (near Pfizer office) and weapons cache (loading bay truck) for max points.
Pro Tips to Avoid Wipeouts
- Flashbang Spam: Use flashbangs in tight warehouse areas to stun suspects safely.
- AI Positioning: Keep your team close—don’t let them wander into kill zones.
- Save Wedges: Let AI carry wedges to free your slots for munitions.
- Stay Patient: Rushing leads to getting aim-botted through crates. Mirror and move slowly.
Why This Guide Rocks
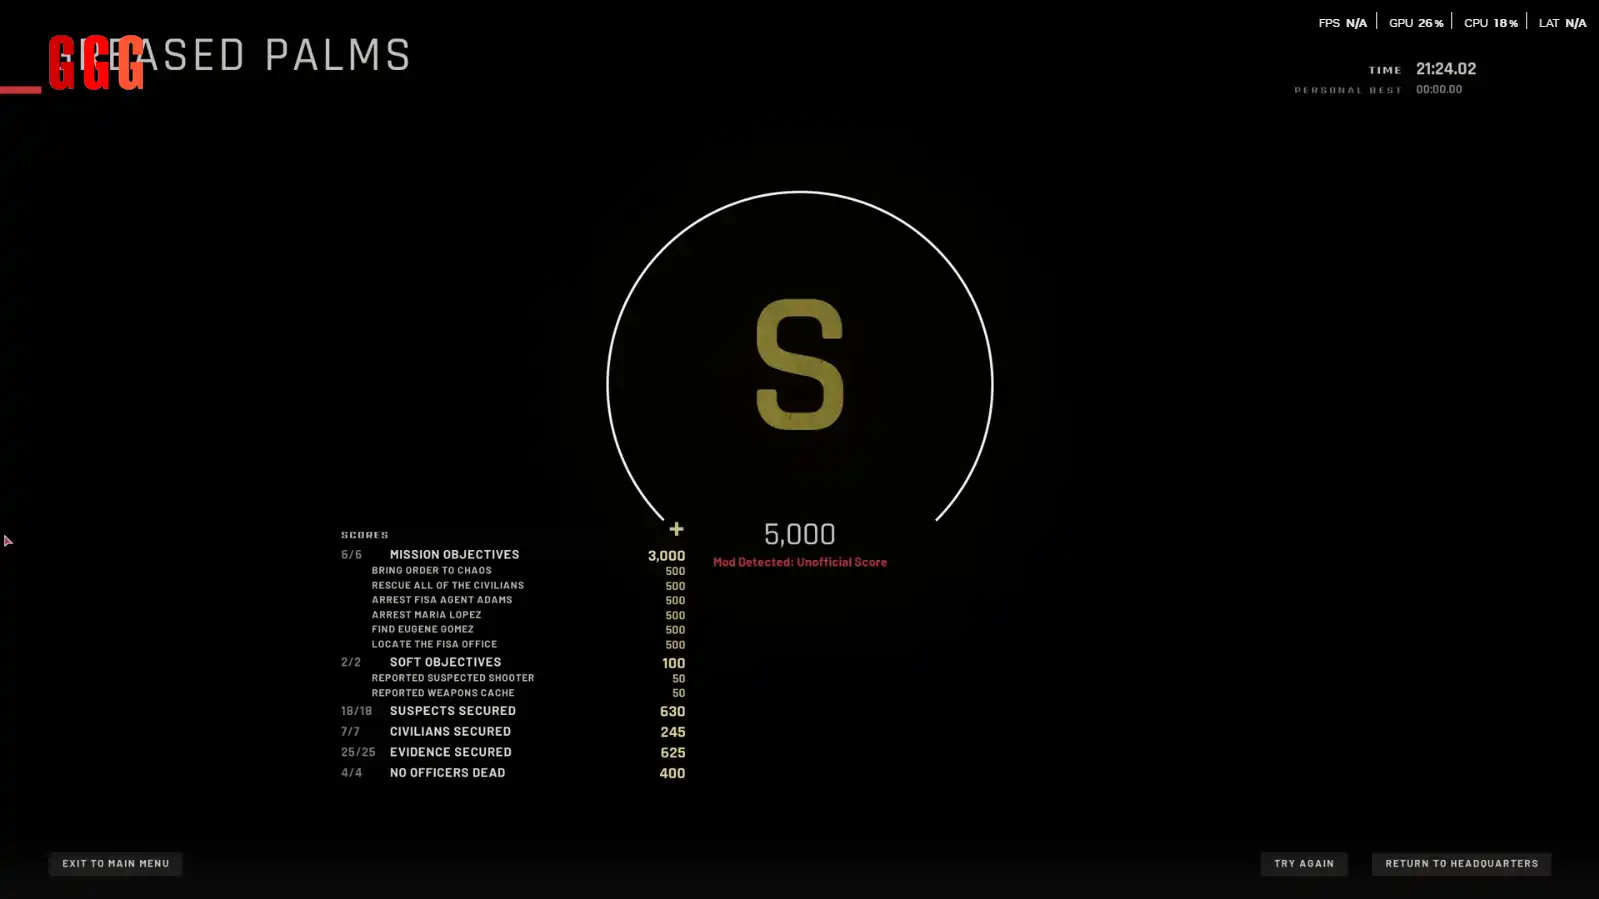
This Ready or Not Tactical Guide is your ticket to mastering Greased Palms’ chaos. With precise loadouts and a step-by-step plan, you’ll bag that S-rank without breaking a sweat. GGGAMER.net has more Ready or Not strats—drop your best clears in the comments below this page and let’s talk tactics!


