Path of Exile 2 The Mad Wolf of Ogham Quest Guide
The final mission of the POE 2 first act in the sequel drops players into an ominous conspiracy, culminating in a brutal battle against Path of Exile 2 The Mad Wolf of Ogham, Count Geonor. The definitive analysis that follows will be your guide to progressing through the quest, revealing essential details, and ultimately crushing the Count in his multiple monstrous guises.
Finding the Target: Ogham Manor Descent
Troubled aristocrat Count Geonor lies in the most inner room of Ogham Manor. It's a natural part of the main quest to arrive at this point, but buckle up for a gauntlet. You have to clear out the three preceding floors of the manor of hostile mobs before you can even begin the boss fight.
Breaking Down the Multi-Phase Boss: Count Geonor's Transitions
The Mad Wolf of Ogham is the game's first multi-phase boss battle, offering players a series of increasingly complex mechanics. The battle spans three distinct transformations: initially as a fast werewolf, between man and wolf forms, and finally as a giant, corrupted monster.
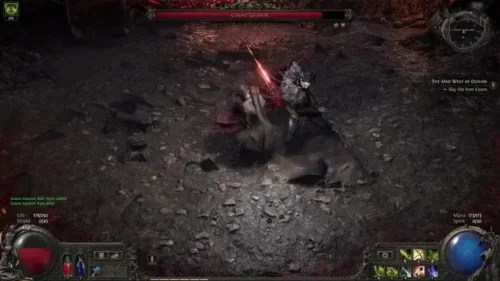
Phase One – The Man and The Wolf
Geonor's initiation sequence switches between expected melee strikes while in human form and wild, icy long-range skills.
Human Form Attacks:
Charge Attack: Geonor runs a quick dash, trying to slam the player into a wall. Strategy: A quick side dash is enough to dodge.
Ice Spear: He fires an icy projectile. Striking directly will momentarily freeze you. Strategy: Employ gentle direction change (sidestepping) to dodge the blast entirely.
Follow-Up Slash: Rush melee attack done as soon as his Charge. Strategy: Stand at slightly more than his standard melee range away from him.
Ice Trap Cone: Geonor attempts to immobilize the player with ice before landing a crushing blow. Strategy: Back up out of the area of effect for the projected cone right away.
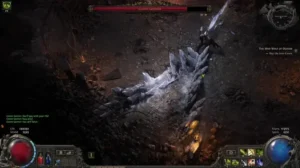
Once a certain amount of damage has been incurred, Geonor drives his sword into the ground and fully transforms into his feral wolf state.
Wolf Form Mechanics:
Blood Spray: A charge forward that hits moderately for an area-of-effect on the front.
Ground Slam: A heavy jump that is easily telegraphed by a red radiating glow over an area on the ground. Strategy: Instinctively move out of the center of the impact area.
Reinforcements: The boss calls forth more wolf minions. Strategy: Focus on killing these adds (or "trash mobs") quickly to avoid getting swamped.
Expert Note: Geonor is much weaker when he's in his human form. While in the state of the wolf, display mastery in keeping yourself alive and clearing the area of reinforcements summoned efficiently.
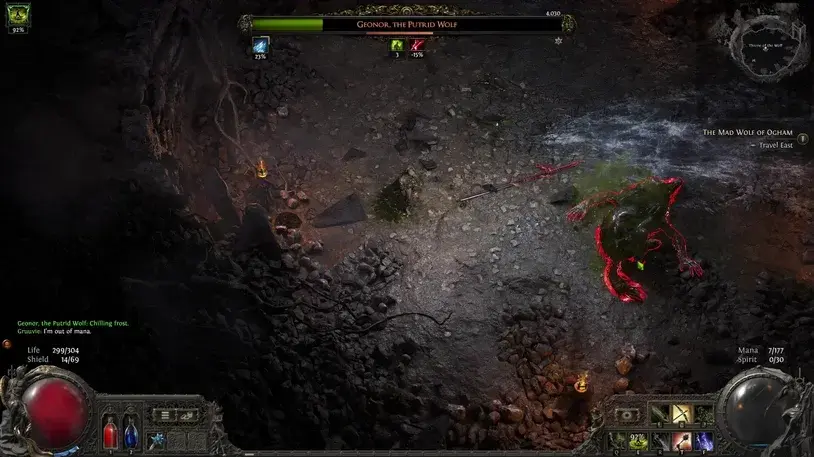
Phase Two – The Corrupted Abomination
When Geonor's health has reached the 50% threshold, the most pivotal plot twist occurs: Oriana escapes, dragging the caged beast with her. Fuming and further corrupted, Geonor is reshaped into a deformed monster with new attack styles.


New Attack Styles in Phase Two:
Freezing Gale/Chilling Frost: A heavy frost spray that lowers your movement speed dramatically, exposing you to follow-up attacks.
Solstice of Pain: Geonor raises his huge axe, bringing down multiple icy beams to attack the battlefield. Strategy: Have high mobility and constantly move around to avoid the projectiles falling towards you.
Ground Ice Spikes: The boss strikes the ground, and the frozen areas burst into deadly spikes. Strategy: Let the patches form first before moving away from the area.
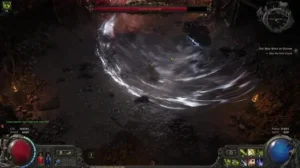
Geonor will sometimes disappear, encircling the arena with a heavy, vision-obscuring fog. Strategy: Stay within the clear, middle ring of the arena. Through this chain, wolves will keep on spawning out of the fog, and Geonor will do powerful charges every now and then. Use Crowd-Control (CC) abilities to manage the flow of wolves and focus on staying out of the boss's unavoidable charges only until the fog vanishes.
The Climax and Rewards of The Mad Wolf of Ogham
Critical Phase (Below 25% Health):
Near the end of his life, Geonor unleashes a burst of frantic ferocity, generating deadly red beams that spit out of the ground. These even appear in the crazy fog phase. Strategy: For a quick victory, employ high burst-damage or stun-locking attacks to exploit his slender health pool. Staying in his final phase will lead to a swift demise.
Having dispatched The Mad Wolf of Ogham, The Hooded One arrives for a pivotal story dialogue, ensuring Oriana's escape to the Vastiri Desert. After The Count's suffering is completed by The Hooded One, you are able to collect your loot.
Loot: Geonor drops a variety of random, high-damage items, including valuable orbs and other essential treasures.
With this fantastic test out of the way, prepare your build and your stash for what troubles and mysteries await in the future zones of the POE 2's second act!
1 Comment
I suggest you to visit a site, with a large quantity of articles on a theme interesting you.