The Full Guide to Bodily Dekham Matriarch in ARC Raiders
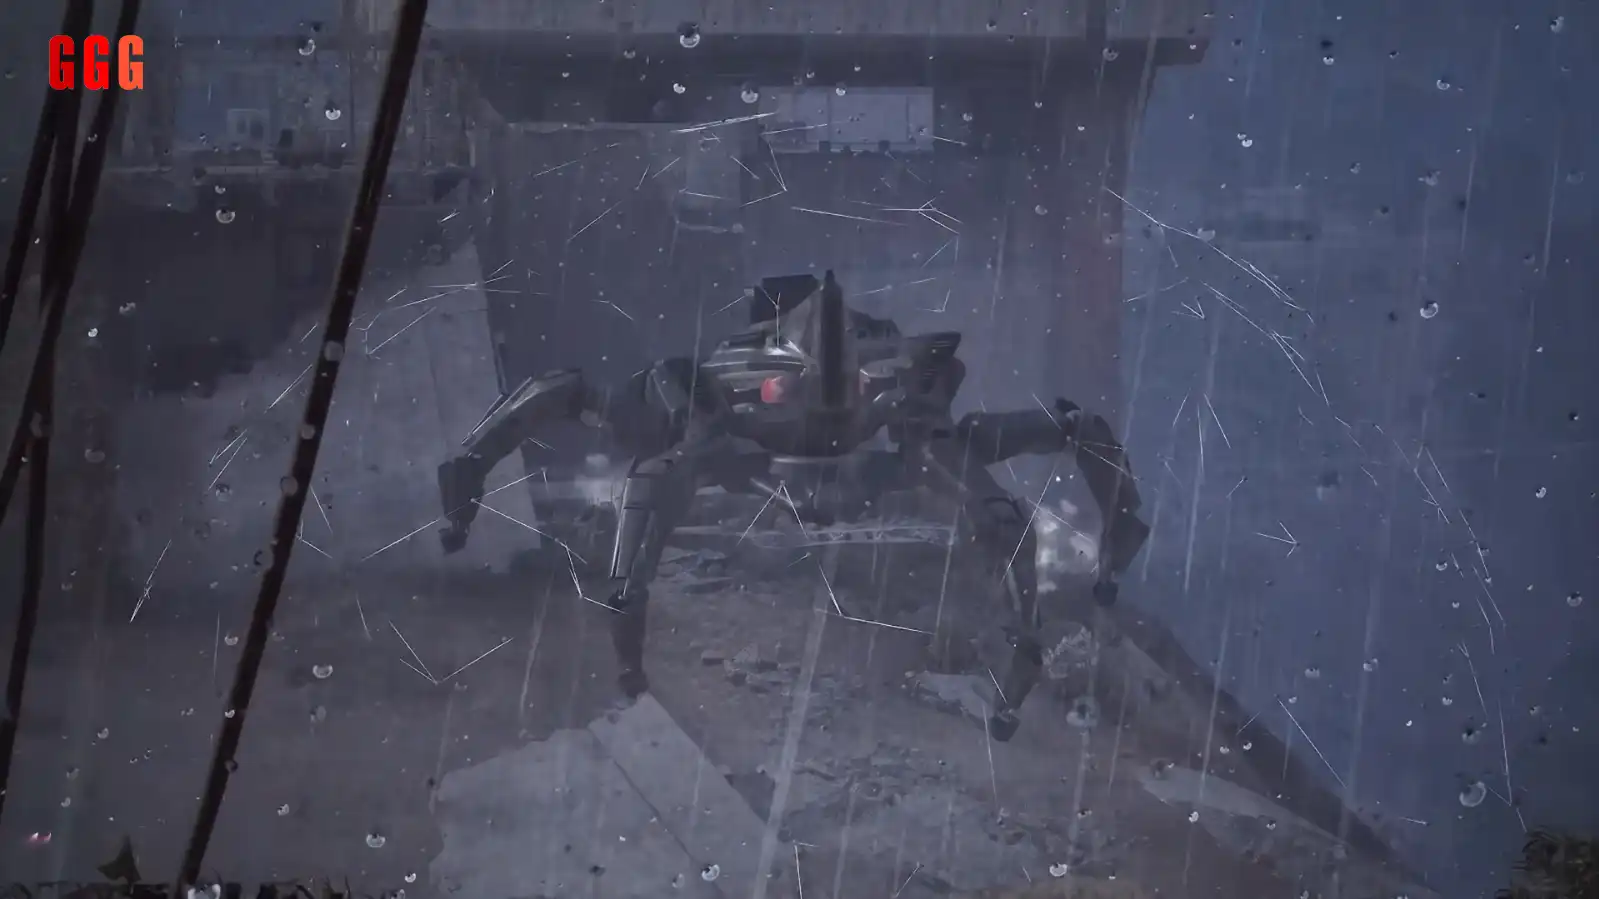
Do you Want to know how to defeat Matriarch in ARC Raiders? The introduction of the Matriarch marks the arrival of the game’s latest and most aggressive colossal boss. This machine features a significantly expanded array of attack patterns compared to the Queen, demanding meticulous preparation. If unprepared, this encounter will swiftly lead to mission failure. The encouraging news, however, is that based on initial experience, the Matriarch appears to possess less overall health than the Queen, allowing for a quicker takedown with less ammunition expenditure.
We have conducted trials using multiple weapons, including the Wolfpack, Jupiter, and Hullcracker. The data confirms that the Hullcracker remains the superior choice. This specialized anti-ARC launcher delivers the necessary burst damage to neutralize the threat rapidly.

For those seeking a comparative analysis of colossal target strategies or a refresher on the foundational fight, consult our Master Guide to Defeating the Queen before engaging the Matriarch.
Ammunition Efficiency for Defense and Duration
To survive the Matriarch's frantic last phase, loaded with missile volleys just before her demise, your defense is supreme requirement:
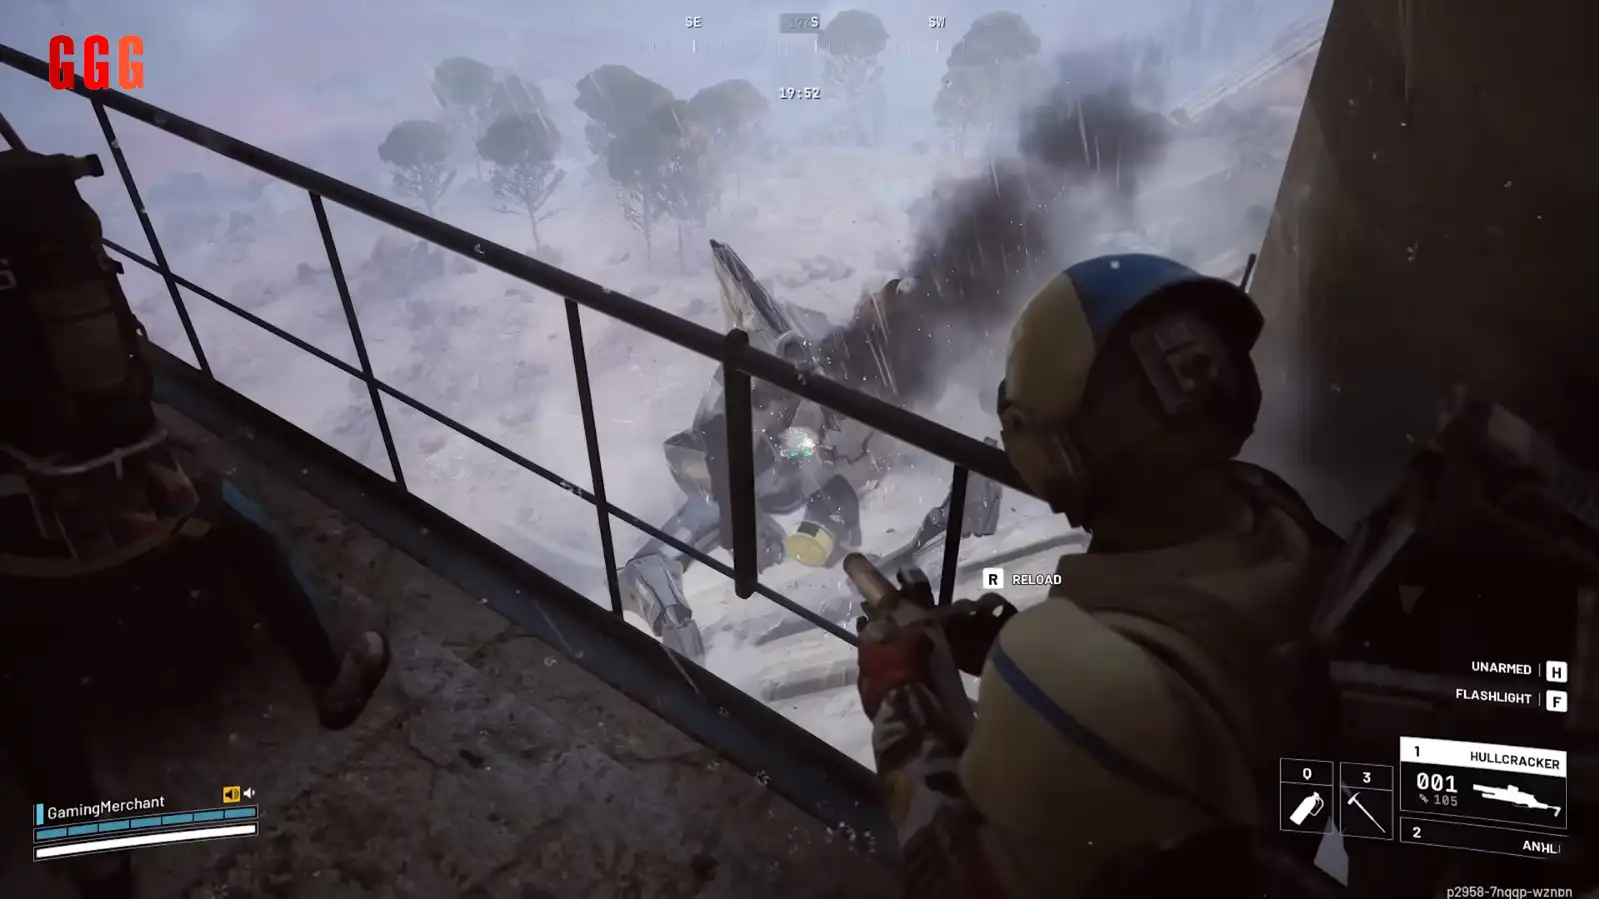
Heavy Shield Requirement: It requires a Heavy Shield (that is backpack able to carrying heavy shield) to wear. Although such equipments compromised space in your inventory, it is the most effective measure in protecting during the dying, aggressive throes of Matriarch.
Ammunition vs. Sustained Fight: because of the lower effective health pool of the boss, you will place medical supplies before you will place massive ammunition. Probably, you will need less than 140 rounds of Hullcracker, so you can take a bigger reserve of Meds and Shield Kits.
Teamwork: Like any big target, a unified group will make a significant difference to your survival and swiftness.
Compiled: Matriarch Attack Patterns and Counter Tactics
The Matriarch's attack profile is characterized by extremely fast, unpredictable projectiles and area denial effects. Understanding and negating these is what will lead to a successful run at Defeat Matriarch in ARC Raiders.
| Attack Pattern | Threat Level | Description | Counter Strategy |
|---|---|---|---|
| Homing Missile Barrage | Extreme | Constant stream of extremely fast, heat-seeking missiles. | Using hard cover. Missiles can be blocked by any physical object; seek cover that completely blocks the line of sight to avoid splash damage. |
| Gas Mines | Medium | Launches mines that create a hazardous area. | Avoid the cloud. The gas itself appears to deal minimal damage but causes uncontrollable coughing, preventing you from firing your weapon. |
| Flash Bangs | Medium | Small devices launched near the boss's position. | Maintain distance. Stand too close, and the resulting flash bang effect will disorient you, leaving you vulnerable to flanking attacks from other enemies or players. |
Managing the Secondary ARC Threat
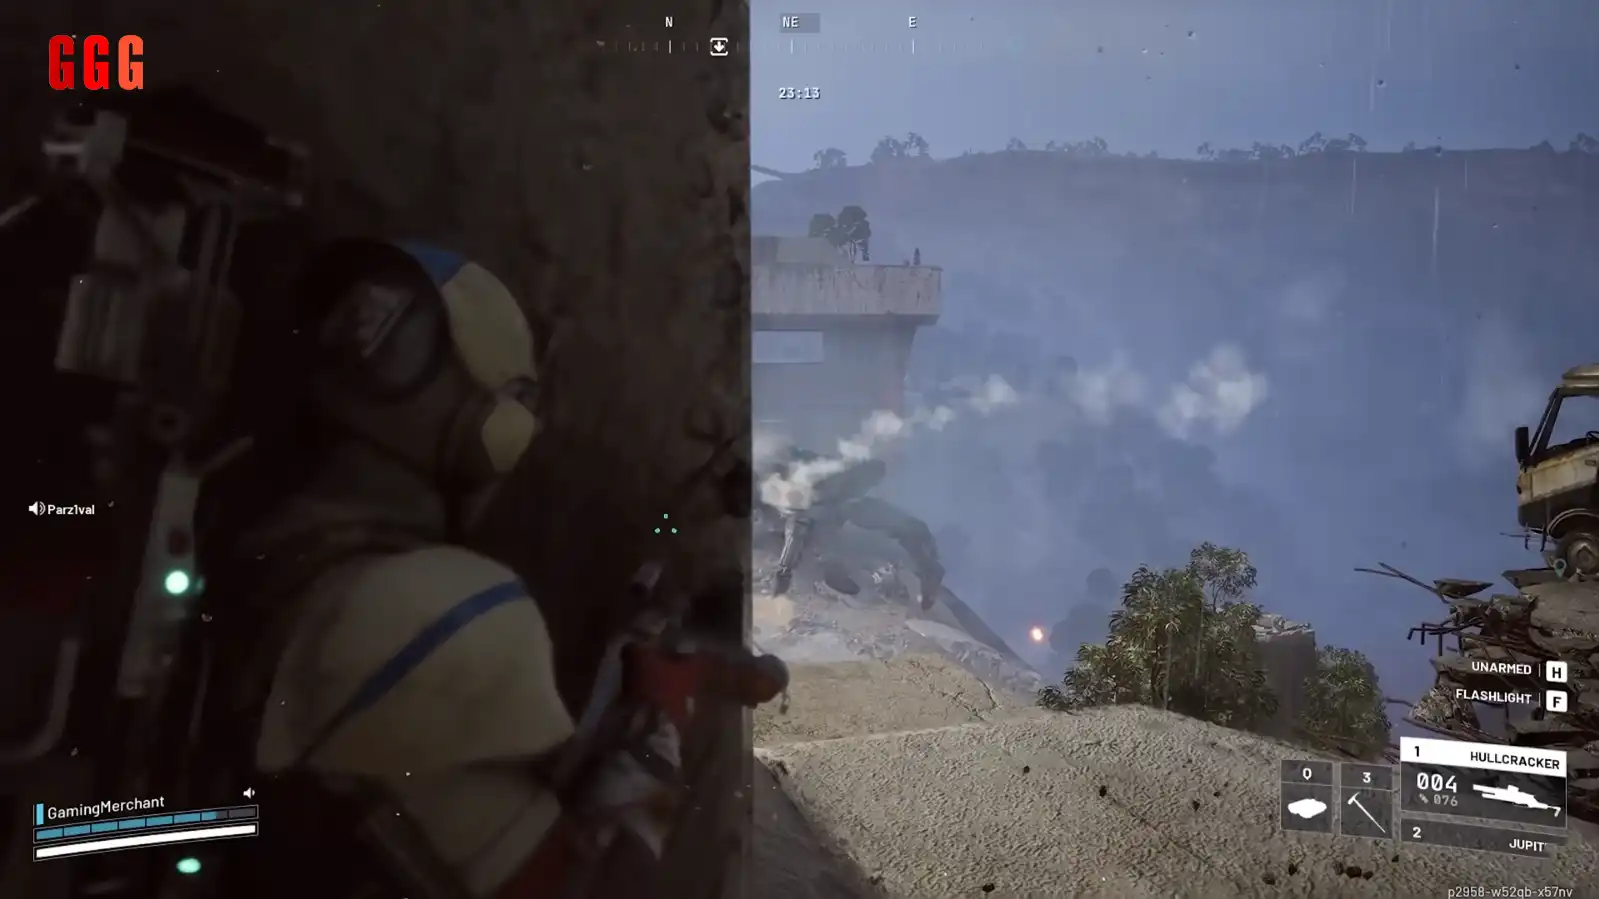
To really differentiate this fight from the Queen encounter, she spawns other ARC units—namely, Rocketeers and Bastions, which can often pose serious threats of mission failure.
Experience with Secondary Threats: My second fight with this boss's Matriarch ended at the last breath of the beast—my own last breath under a Bastion which happened to spawn later. Other later teams coalesced instead and got the loot, leaving me empty-handed. It's the environment that isn't made just by the Matriarch, but by its entire entourage.
Rocketeers: The damage here is blinding and therefore compromising their entire flank is underneath both flanks and back-harness.
Bastions: These are the primary loot denial units. They can lock down an area and prevent you from securing the Matriarch Reactor after the kill.
To achieve a clean loot and extract, you must be prepared to eliminate these secondary targets instantly upon spawn.
Weaponized Weaknesses to defeat Matriarch in ARC Raiders
The Matriarch has unique shield mechanics and unique weak points; without exploiting both, to Defeat Matriarch in ARC Raiders, it must die much faster.
Shield Phase and Core Damage Protocol
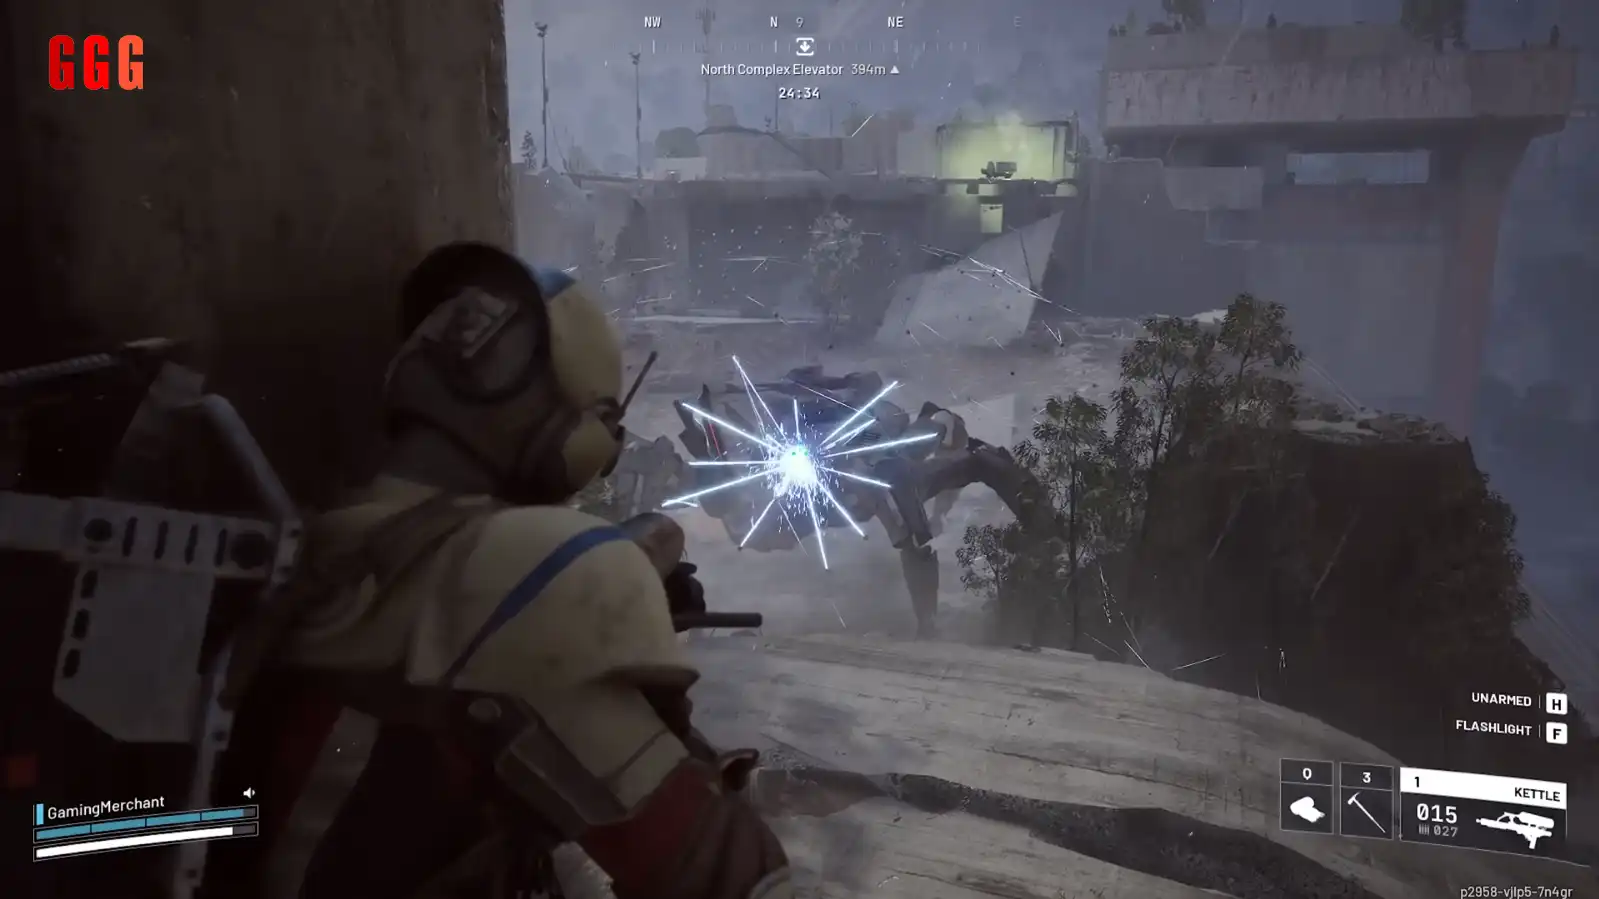
There would be a big, blue, impenetrable shield active while fighting the Matriarch.
Shield Protocol: Cease fire when blue shield is active. It is now up to the blue shield's dissipating of itself before anyone can shoot at it again.
Head Focus: Aiming for head is the most constant, efficient strategy ever. Consistently shooting through this area tends to expose the biggest weak point of the boss, that is, the red core in her chassis. A maximally exposed core dealing maxim damage.
Damage Through Legs: you could shoot off part of damage through legs (they're more armored than those of queen), but breaking casing on the outer level causes the machine to fall briefly and then you have a little DPS window. But usually, head focus is always more efficient.

The Optimal Location and Loot Objectives
It is always the most ideal map for reliable farming of such massive beasts as Dam Battlegrounds because it has better cover infrastructure. We do not recommend doing this fight in open areas such as Blue Gate because of a lack of cover.
Loot Priority: Has a Matriarch Reactor basis for the new Energy Burst Rifle or Battle Rifle—in construction. These blueprints are possibly related to unlocking Stella Montis content.
Extraction: Giorgio needs to lock up most of his attention on tumbling after a kill since, quite as much as Bastions would do last. Rush into the blast point of the Matriarch, secure the Reactor and gather purple items, quickly escape using the nearby Raider Hatch.
The main modules would, in this case, heavily focus on matching the well-defined vantage of strong areas while nakedly dishing out continuous damage on the head/red core and clearing out immediately any secondary ARC threats that spawn. This represents the narrowest approach to achieve a successful defeat of Matriarch in ARC Raiders, against which the rarest loot can be secured.
For a detailed breakdown of the Matriarch's unique Legendary drop, the Aphelion Battle Rifle, and its crafting components, consult our focused guide: Get Legendary Aphelion Blueprint.