GTA 6 Setting Guide | What options should we set before starting the game?
In the GTA 6 settings page, you're faced with tons of different options, and you might not know what a lot of them do. But with this GTA 6 Setting Guide, you can easily set them up right so you can get more FPS in the game. Just before we dig into these settings, I should say some of them are totally personal and up to your taste, but some really help you have a better experience.
To access Settings, hit the start button, then once the menu opens, go to the end of the list. There you'll see a few sections: Controller, Gameplay, Display, UI, Camera, Sound, and the GTA+ section.
Controller settings
In GTA 6, you're dealing with three levels of controller settings:
- Default: This option is the game's new default layout.
- Classic: Based on the settings and controllers from older GTA games.
- Left-Handed: Made for left-handed players.
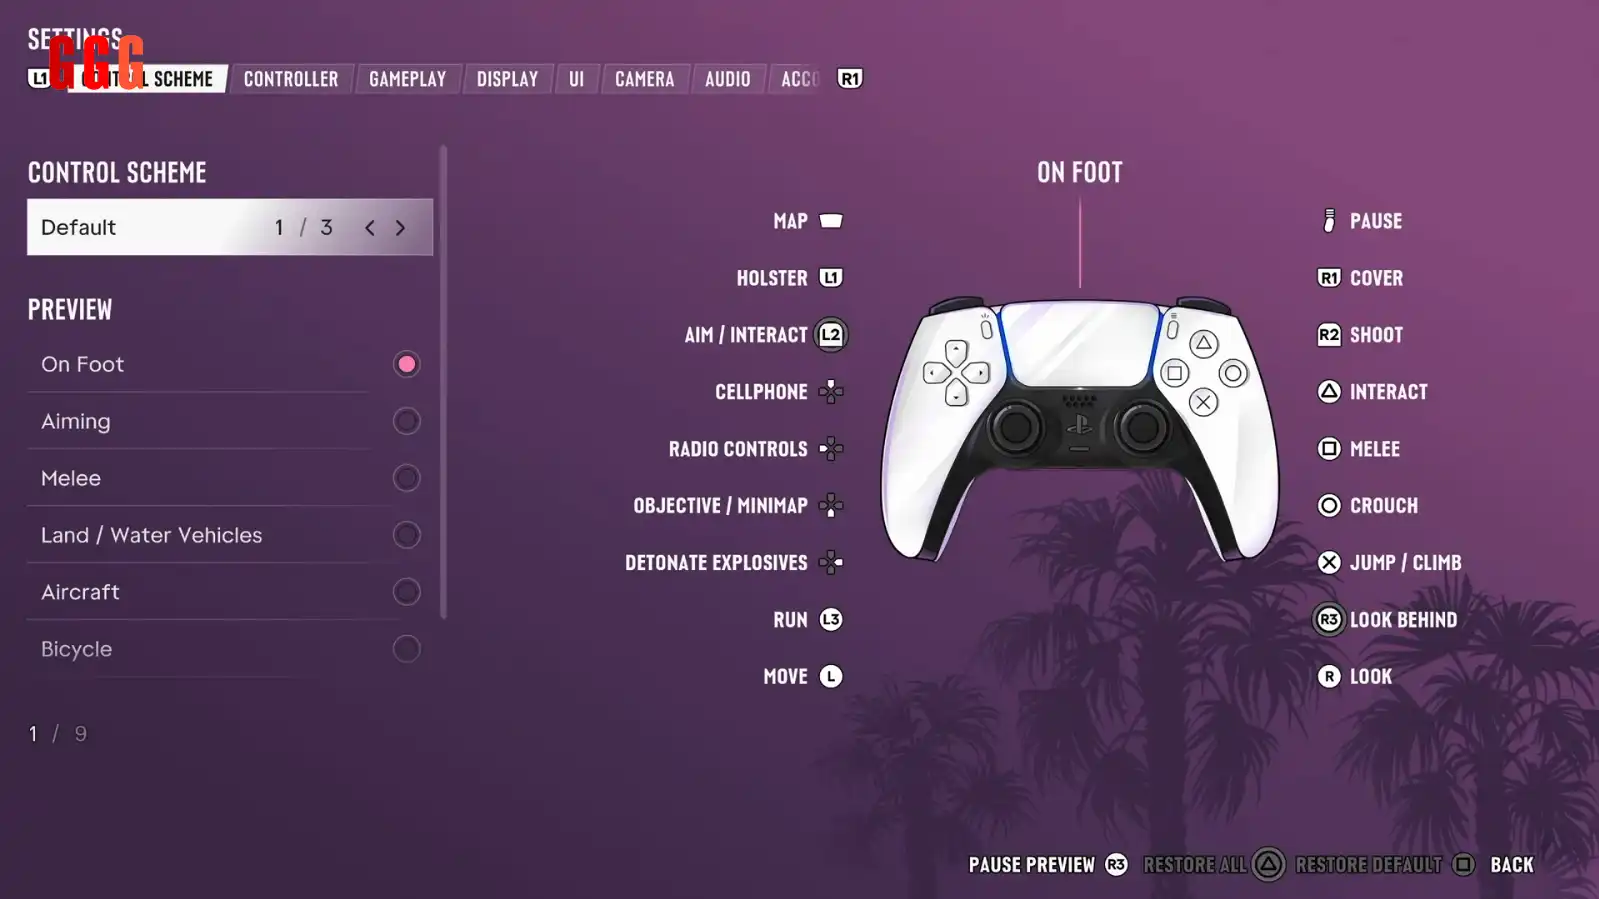
The biggest difference between Default and Classic is the Run button. In Default, you gotta click the Left Stick, while in Classic it was done with the X or A button. This small change might confuse people who were playing GTA 5 until recently, and in that case you can easily use the Classic settings.
The Touchpad button on PlayStation
On PlayStation consoles, the Touchpad button opens the map by default, but you can remap it to rotate the camera angle in different ways, which is super useful. You can also access the game map through the Pause button.
Note: In the controller settings, there's a section called Help that gives you guides for hand-to-hand combat, driving, swimming, flying, bikes, and the parachute.
Gameplay settings
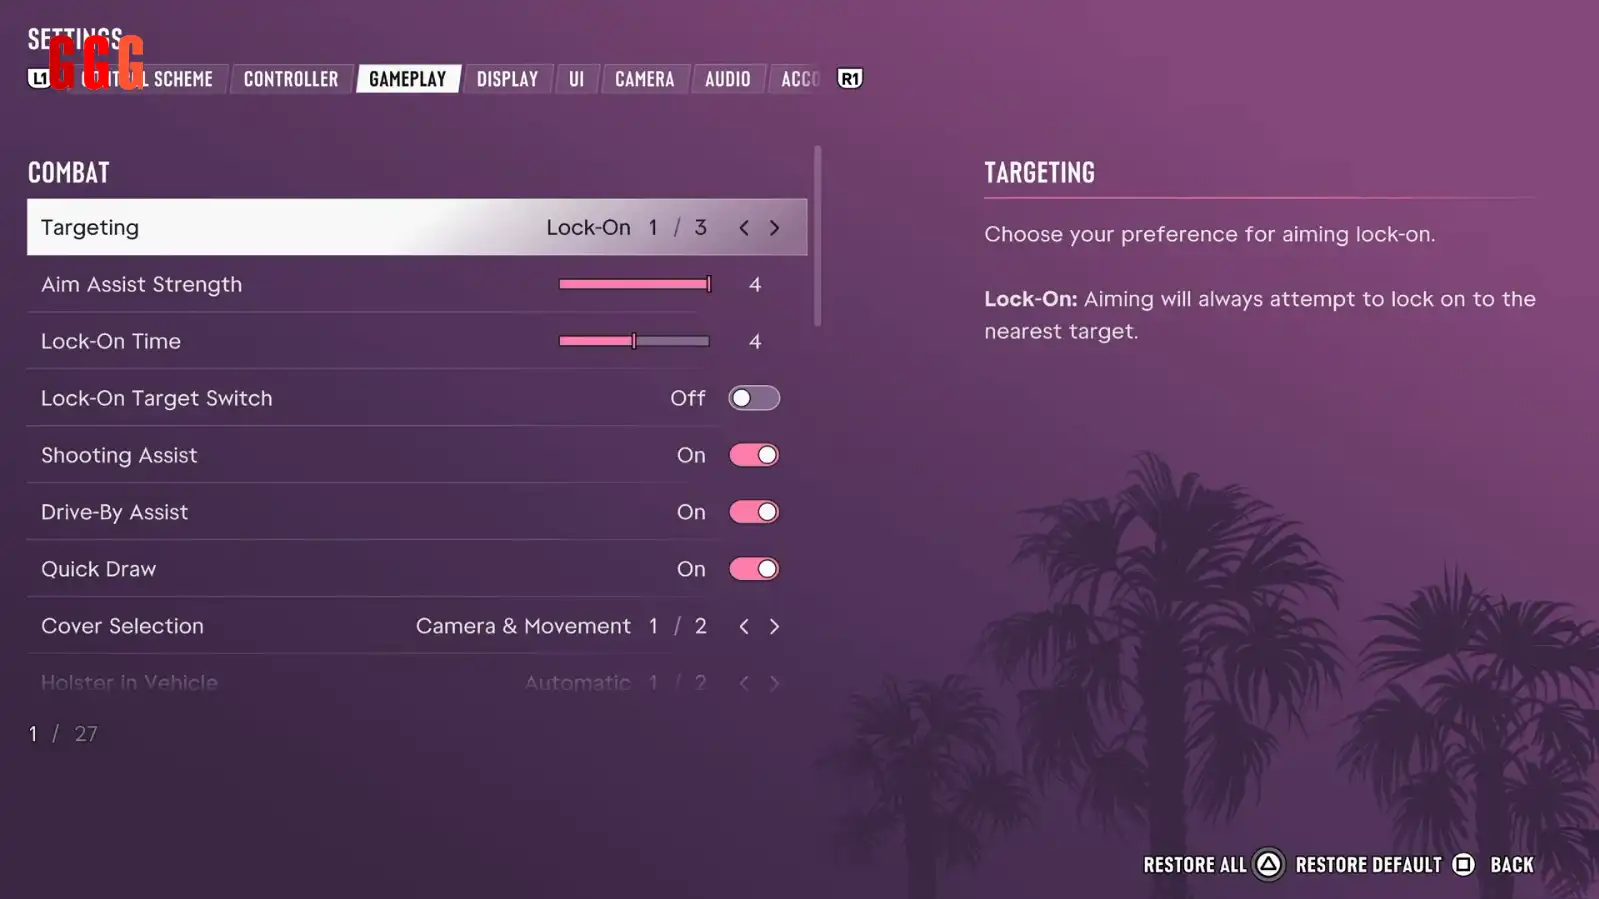
The first thing I'm covering in this part of the GTA 6 Setting Guide is Targeting, since it has a big impact on shooting, which you'll be doing a lot in the game. You've got three options here:
| Mode | What it does | Who it's for |
|---|---|---|
| Free Aim | You can never lock onto a target in this mode | If you want a bit of a challenge, this is for you |
| Assisted (middle mode) | Gently pulls your aim toward the target so you can hit them easier | Most players are more comfortable with this |
| Lock-On | Locks your gun's aim onto the enemy | You just gotta shoot and it does the rest—good for beginners |
When you pick Lock-On, two more options become available. The first is Lock-On Time, which sets how long you stay locked on before returning to Free Aim, and the second is Lock-On Target Switch, which lets you switch between enemies near your aim.
In this section, there's also an option where you can pick your movement speed from four choices: Walk, Fast Walk, Jog, and Run. Basically, this sets your speed when you move the stick. Here you should see which movement type feels best—if you feel like you're moving too slow, you can bump up your speed here.
Stand on Sprint option
When Stand on Sprint is on, pressing the Sprint button takes you out of Crouch and makes you stand up. This can cause trouble in missions where you need to be stealthy. So it's better to leave it off early in the game.
Accessible and Combat
At the bottom of the screen, you'll see two options called Accessible Combat that noticeably change the game—Rockstar even warns about this. These options reduce enemy health and the damage they take, and also reduce damage to vehicles. If you're looking for a challenge, leave these alone, but if you just wanna finish the story, you can change them.
Display settings
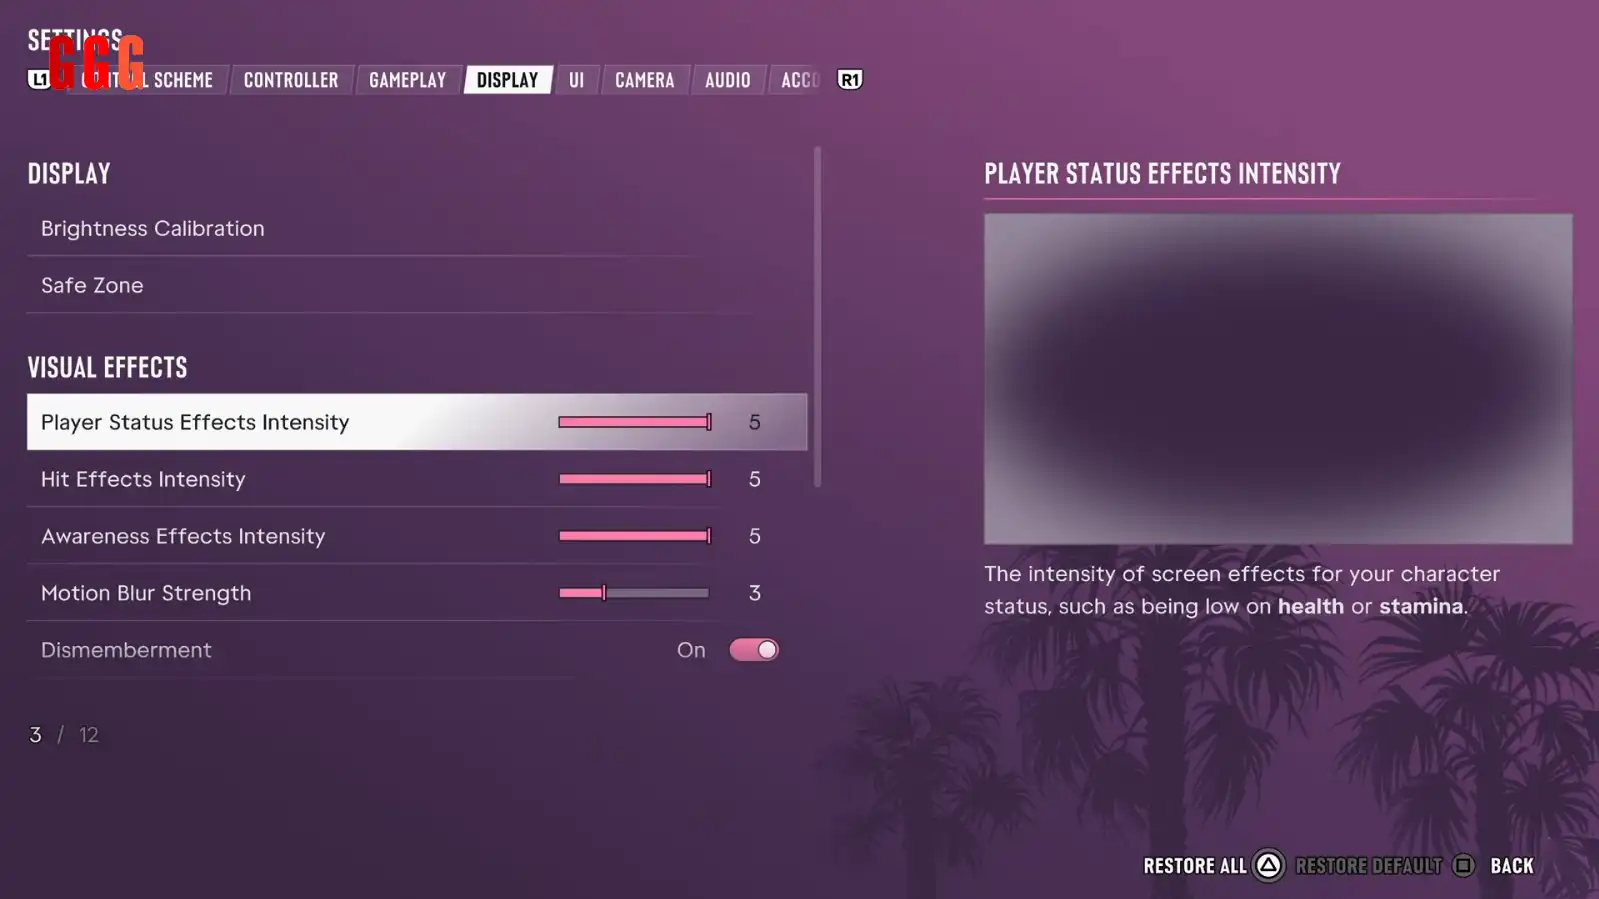
If the visual effects on screen are too much and clutter the scene, you can turn their intensity up or down. In my opinion, setting it to 3 is about right. The Motion Blur option is up to your taste, but it might affect your FPS.
Two options you should set if you're playing around kids are Dismemberment and Blood and Gore. Dismemberment focuses on body parts getting cut off from damage, and Blood and Gore controls blood intensity with three levels: Low, Medium, and High. If you're sensitive or have young kids around, definitely balance these settings.
UI settings
In the GTA 6 Setting HUD section, which shows info on screen, there are lots of settings and you're faced with different options:
- Mini Map: You can set this to three modes: always on, always off, or Dynamic.
- Compass: This can also be fixed or dynamic and changing.
- In-World Markers: This option can ruin your immersion and makes you see something whichever way you turn. It's better to leave it off, except for Objective and Door Markers.
- Reticle: This is the in-game crosshair, set to Complex by default, which changes based on the weapon you're using. If you want something simpler, you can pick Dot or None.
- Projectile Arc: This shows the path of grenades or other projectiles until you get the hang of how to throw them. I suggest turning it on.
Progress Notifications
This section notifies you when a Weapon, Vehicle, or Animal is found, and I recommend turning it on since it's off by default.
Another notification is Vehicle Prompt, which is also important and is for vehicles you can't get into. This option is off by default, but it's better to set it to Dynamic so it only shows when you need it.
Camera, Sound, and...
This part of the GTA 6 Setting Guide is kind of a matter of taste, especially the camera. Since you play with two characters, Jason and Lucia, the camera moves between them, which is why there are more passenger-in-car options than previous games. I suggest adjusting the camera option after a few hours of playing to see which one you're more comfortable with. You can also set how the phone displays—by default it's Third Person, and if you set it to First Person, it looks over the shoulder. You can also turn off the cinematic mode when you put the controller down.
Sound settings
- Controller Speaker: I think it's better off, but it's totally up to you.
- Vehicle Audio Cues: You've got three options: All, Tone and Voice only, or you can pick none.
- Licensed Music: This one's for people who stream on YouTube or Twitch. If you leave it on, you might run into copyright issues.
- Vehicle Radio: By default, if the previous driver was listening to the radio, it keeps playing for you when you take the car.
GTA+
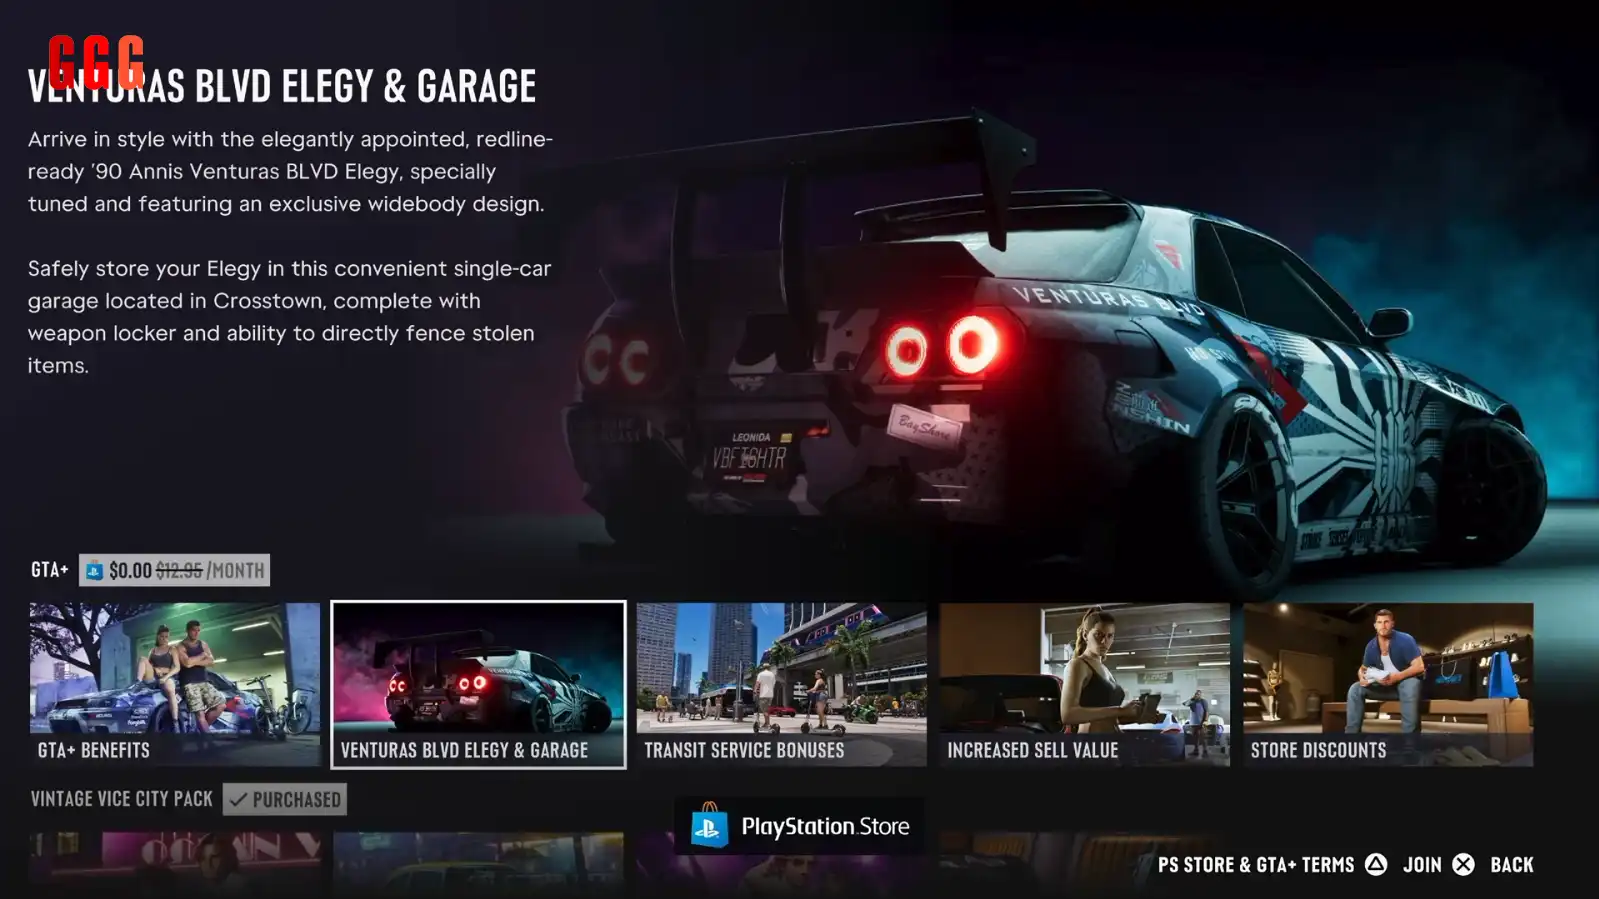
The last thing I'm covering in this GTA 6 Setting Guide is GTA+. People who've bought GTA+ should link their account to access GTA+ Boost perks. Of course, you can't get them all right away—they become available over time. Some of the GTA+ perks include:
- Getting discounts in the store
- Selling personal vehicles for 10% more under certain conditions
- A 10% discount on buying any kind of business across Leonida
- Other perks too, including special care for your vehicles
Note: By linking your Rockstar Games account, you can also access other exclusive items in the Modify section at the Ammu-Nation store.
Most important tips from the GTA 6 Setting Guide
The main settings that matter for starting the game include: first, pick your controller type. Then do your Targeting settings. After that, definitely turn on the Weapon/Vehicle/Animal notifications. Fourth, go to Projectile Arc and turn it on. And finally, if you're making content for YouTube or Twitch, turn off Licensed Music. These are the main things I told you in this GTA 6 Setting Guide that you should set before starting the game—the rest you can change during the game to your taste.
Definitely share your thoughts and experiences with us in the comments, and for more game guides, check out the GTA 6 Guide page.